
Safety Training Requirements[edit | edit source]
- Dr. Pearce Safety Lab Tour
- Worker Health & Safety Awareness
- WHMIS 2015 - Workplace Hazardous Materials Information System
- Laboratory Safety & Hazardous Waste Management
Safety Issues With Method[edit | edit source]
- We have to make sure coco coir cups meant for growing and are stored in a place free of humidity to avoid mold.
- Instrument like tweezers used in the process of germination should be sterilized appropriately to avoid cross-contamination.
Personal protective equipment[edit | edit source]
PPE is to keep YOU safe so that you can keep doing what you want to do.
- Safety glasses – always required
- Gloves
- Lab coat
SDS and other[edit | edit source]
- Appropriate Standard should be followed to enter the Agrotunnel.
- Standards should be found on the entrance door of the Agrotunnel.
Equipment Name[edit | edit source]
- ICFAR- Agrotunnel
- Vertical grow walls
- Grow lights
- Tweezers
- Seedling Trays
- Labelling pen/pencil
- Seeds
- Coco-coir cups
- Spray bottle
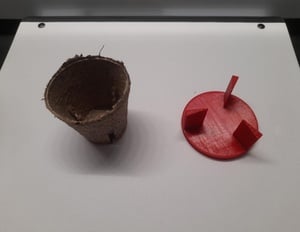
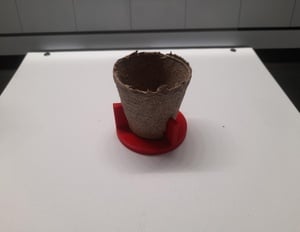
- Scissors or 3D-printed pot hole puncher
- Seed sorter for placing tiny seeds into peat pots.
Light and Temperature Tolerances[edit | edit source]
- Light should be constant 24/7 throughout the cycle of the plants.
- Temperature should be constant at 19–22C° which is considered as favorable range.
- Block any source of external/secondary light.
Operation & Procedure[edit | edit source]
We need to collect all the required items needed for germination and planting, then start the process following the steps in orderː
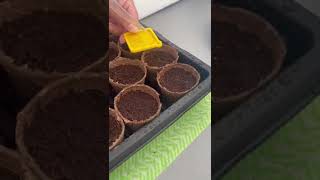
1. Preparing the Coco-coir cups
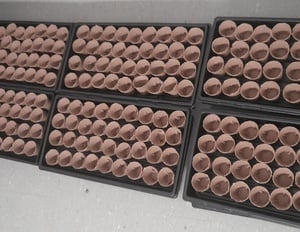
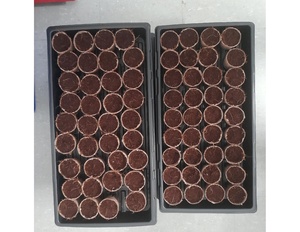
The first step is to determine the number of coco-coir cups needed for planting and the number of seedling trays required to hold them. For example, in the FAST research lab, each seedling tray can hold 36 coco-coir cups, arranged in 4 rows and 9 columns. Each grow wall has capacity for 720 coco-coir cups, which required 20 seedling trays.
The next step is to use a pot hole puncher, facing up, and gently push it against the bottom of each coco-coir cups to create three clear slits.
Carefully place the cut coco-coir cups into the seedling trays, and repeat this process until all 720 coco-coir cups (or any other required number of coco-coir cups) have been cut at the bottom and placed into the seedling trays.
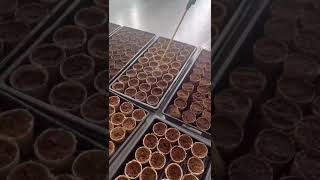
2. Filling the pots with coco coir
Gently remove a coco-coir cup from the seedling tray and place it on the table to fill with coco-coir until it reaches the top edge. Next, press down on the coco-coir with a little force until the surface is completely flat and about 1 cm below the rim of the coco-coir cup. Gently return the coco-coir cups to its original position in the seedling tray. Repeat this process until all coco-coir cups are filled with coco-coir.
3. Planting the seeds
Gently place a seedling tray on the table. Next, use tweezers to twist halfway downward at the center of each coco-coir cup. Open a bag of seeds and place two seeds into the center of each coco-coir cup on the seedling plate. Ensure that no more and no fewer than two seeds are placed per coco-coir cup. Carefully add a layer of coco-coir on top of each cup and press down gently until the surface is completely flat. Repeat this process until all coco-coir cups are planted with seeds.


4. Spraying the pots
Spray all germination coco-coir cups with water to ensure proper hydration before germination. Make sure that all coco-coir cups are sprayed with enough water, indicated by the top of the coco-coir cups darkening in color.


Shutdown[edit | edit source]
1. Cleaning the ports
Inspect all the walls for cleanliness before placing the planted coco-coir cups. Clean all the reservoirs after inspection. Once everything is properly cleaned, place the planted coco-coir cups into the reservoirs.

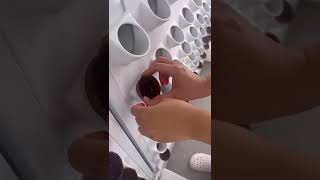
2. Placing the pots on the wall
Place the planted coco-coir cups, each with three cut slits, into the empty ports on the wall. Ensure that one of the three slits is facing directly upward in the center when inserted into the wall, with the two bottom slits angled downward at 45 degrees.


3. Covering the empty ports
Place the mature plants that need more water to grow at the top of the wall, and the coco-coir cups with smaller plants that require less water at the bottom. If any empty ports remain on the wall after planting all the coco coir cups, cover them with caps.


4. Watering the recently planted pots
The final step involves filling the reservoir of each tank according to the target (Electrical Conductivity) EC and pH for the specific crop. Run the pump manually for 2-3 minutes, just enough to moisten the pots. Seedlings do not require a daily watering cycle. The daily watering cycles will be scheduled after germination.
References[edit | edit source]