3D Printing Failure Database
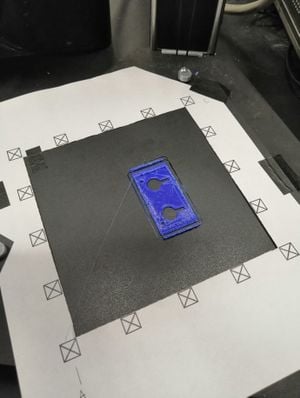
Having the failure database of all kinds of 3D printing technology will be highly beneficial to develop an intelligent additive manufacturing, and collaboration of makers around the world will help us to reach this goal significantly faster.
On this page, we are trying to systematize a set of rules for creating a uniform dataset that will be convenient to work with in the future.
Contrast visual marker template[edit | edit source]
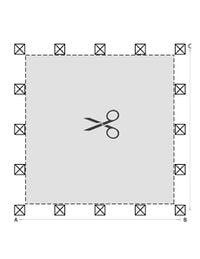
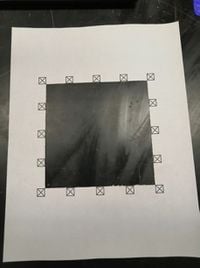
First thing you need to do is to prepare a contrast visual marker template:
- Download a template and print it on a letter-size paper (fit to format or 100-120% scale, precise dimensions in millimeters are not that important since you provide them together with your image, so we can restore the real scale)
- Cut a square area in the middle of the paper
3D print your part[edit | edit source]
In case of failed print, please do the following:
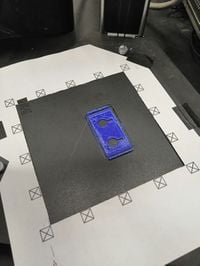
- Put your visual template right on the printing bed (do not remove the failed part). You can cut out its corners or middle parts and use tape so the template aligns with the bed.
- Take a picture of the failed part on the bed (as high resolution as possible; black square X-markers should be visible in your picture; try to avoid significant light reflections)
- Fill out the table and send the picture (described in the section below)
Fill out the table[edit | edit source]
The information you provided will help us to process your image appropriately and to generate a solid database.
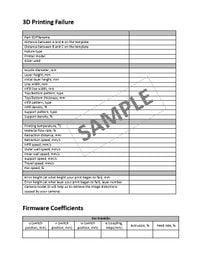
- Download the information template: File:Table to fill failure database 3 ap.odt
- Fill the tables
- Attach the STL file of the failed print
- Attach the G-Code file of the failed print
Send the picture, STL file, G-Code, and filled tables[edit | edit source]
Email all the necessary files (preferably with the same filename) to apetsiuk(at)mtu.edu:
- bronze_husky.JPG
- bronze_husky.ODT or .DOCX
- bronze_husky.STL
- bronze_husky.GCODE
Example[edit | edit source]
| Parameter | Value |
|---|---|
| Part ID/Filename | Blue_case.jpg |
| AB distance | 156 mm |
| BC distance | 156 mm |
| Failure type | Under extrusion |
| Printer model | Delta, Athena II |
| Slicer used | Ultimaker Cura |
| Nozzle diameter | 0.4 mm |
| Layer height | 0.25 mm |
| Initial layer height | 0.25 mm |
| Line width | 0.4 mm |
| Infill line width | 0.4 mm |
| Top/Bottom pattern, type | Lines |
| Top/Bottom thickness | 0.4 mm |
| Infill pattern, type | Grid |
| Infill density | 80% |
| Support pattern, type | Zig Zag |
| Support density | 15% |
| Printing temperature | 210 C |
| Material flow rate | 100% |
| Retraction distance | 6.5 mm |
| Retraction speed | 25 mm/s |
| Infill speed | 50 mm/s |
| Outer wall speed | 25 mm/s |
| Inner wall speed | 50 mm/s |
| Support speed | 50 mm/s |
| Travel speed | 120 mm/s |
| Fan speed | 100% |
| Error height [mm] (at what height your print began to fail) | 2 mm |
| Error height [layer number] (at what layer your print began to fail) | 8 |
| Camera model (it will help us to retrieve the image distortions caused by your camera) | Cellphone camera |
| Firmware coefficients | |||||||
|---|---|---|---|---|---|---|---|
| Franklin: | u (switch position, mm) | v (switch position, mm) | w (switch position, mm) | e (coupling, steps/mm) | Extrusion, % | Feedrate, % | Max travel speed, mm/s |
| 228.050 | 226.740 | 228.850 | 90.000 | 100% | 100% | 100 |
More examples of pictures[edit | edit source]
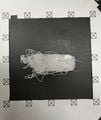
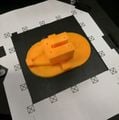
These are low-resolution samples. Your photos should be in higher resolution.
-
Slip base error
-
Over extrusion
-
Stringing
Have a great printing[edit | edit source]
We wish you a failure less printing, but even in case of printing error happened your participation will help us to prevent these disappointing things in the future.
Thank you for collaboration!
The following links can help you better understand the nature of the failures and adjust your printing parameters with maximum efficiency:


