Uniplanar External Fixation/3D Printed Adult Male Tibial Bone Models/Prepare 3D Print Files

Prepare 3D Print Files[edit | edit source]
Have these instructions displayed on a mobile device to verify that all the steps are properly performed when preparing the print files on a computer.
Please pay attention to and follow all the instructions closely to ensure the bone models are printed properly and display the required visual, tactile, and acoustic fidelity for simulation-based skills training.
Do not change the filament material and do not deviate from these published print settings because they have been pre-tested to ensure the fidelity and printability of these surgical simulators.
Download the 3D files (.STL) in the table below to input the print settings for the specific 3D printer to create the print files (.GCODE).
| Model # | Download STL File | Revision Date |
|---|---|---|
| 1 | Click on this link and click on "Model_1_-_Male_-30-Dec-2024_version.stl" to download the file. | December 30, 2024 |
| 2 | Click on this link and click on "Model_2_-_Male_-30-Dec-2024_version.STL" to download the file. | December 30, 2024 |
You will need to download, install, and use the latest version of:
- Ultimaker Cura, the world’s most popular 3D printing software with millions of users, which already has profiles for many commercially available 3D printers, allows you to create a custom profile for other 3D printers, and is open-source and free to download,[1] or
- Cura LulzBot Edition if you are using any of the open-source, open filament LulzBot 3D printers, or
- Prusa Slicer if you are using any of the open-source, open filament Prusa 3D printers, or
- Bambu Studio if you are using any of the open filament Bambu Lab printers, or
- FLsun Slicer if you are using any of the open filament FLsun printers.
If your 3D printer cannot print g-code files created using Ultimaker Cura, Cura Lulzbot Edition, Prusa Slicer, Bambu Studio or FLsun Slicer, you may not be able to print the Adult Tibial Bone Models. Without using Ultimaker Cura, Cura Lulzbot Edition, Prusa Slicer, Bambu Studio or FLsun Slicer software, you may not be able to input the custom print setting options, the bone models will not print properly and the simulators will not display the required visual, tactile, and acoustic fidelity for simulation-based skills training.
Do not substitute PLA filament with acrylonitrile butadiene styrene (ABS), engineering co-polyester (CPE+), or glycol-modified polyethylene terephthalate (PETG) filament because our December 26, 2021 internal testing found that 3D printed bone models made of Ultimaker ABS filament (Shore Hardness 76D), and Ultimaker CPE+ (Shore Hardness 77D) were unable to tolerate powered or manual drilling of a self-drilling 4.5 mm diameter Schanz Screw during simulation training, and our research has found that Ultimaker PETG has a Shore Hardness of 76D.[6][7][8][9][10]
If you have previously modified any values from the 3D slicer program's default settings for PLA filament, please change these values back to the default settings by clicking on the circular arrow to the left of each modified setting.
For optimal print results and to minimize the risk of mechanical failure of the bone models during simulation-based skills training, always use brand new white PLA filament fresh out of the sealed package.[11]
- If the 3D printer has a build volume Z height of at least 200 mm, all 3D Printed Adult Tibial Bone Models can be printed at 100% and no re-scaling is required.
- If the 3D printer has a maximum build volume Z height between ~180 mm to 200 mm, all 3D Printed Adult Tibial Bone Models must be uniformly and identically re-scaled at less than 100% and at the highest scale factor which permits printing on the specific 3D printer.
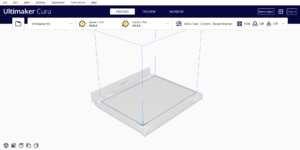
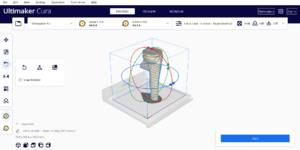
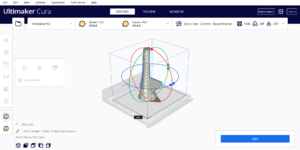
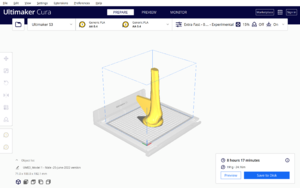
- The Ultimaker Cura 5.0.0 program shows the 3D model with grey stripes to indicate that the model does not fit inside the 3D printer's build volume and needs to be re-scaled.
For uniform scaling at the highest scale factor for both Models 1 and 2, we recommend scaling Model 2 before Model 1 because Model 2 is slightly larger than Model 1.
- If your 3D printer has a build volume Z height between ~180 to 200 mm, click on the 3D model on the build plate.
- Click on "Scale."
- Uniformly scale the model to the highest scale factor which permits printing on the specific 3D printer.
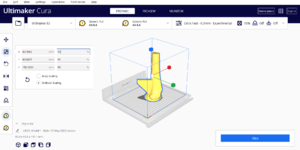
- With the "Uniform Scaling" box checked, input a percent value less than 100% (i.e., 95%) in the X row and press "Enter" on your keyboard to uniformly re-scale the model.
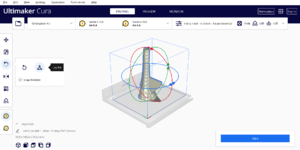
- Click on "Lay Flat" to ensure the model is lying flat on the build plate.
- Check if the re-scaled model fits in the 3D printer's build volume. In the Ultimaker Cura 5.0.0 program, the 3D model's colour will change from grey stripes to solid yellow to indicate that the re-scaled model now fits in the 3D printer's build volume.
- Repeat the prior 3 steps above with different percent values (i.e., 94%, or 96%, or 97%, etc.,) until you identify the highest percent value that permits printing of the re-scaled model in the 3D printer.
- Record the scale factor (i.e., 95%) and apply the identical scale factor for the other models.
- To deselect the model, click anywhere in the slicer screen outside of the model.
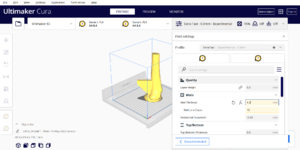
To avoid print quality issues, the layer height should be 0.15 mm to 0.3 mm or less.
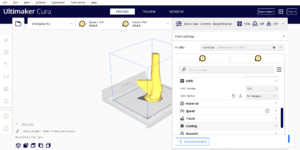
Do not select the "Support" option because support material will cover up the semi-engraved model number, gender symbol, and drilling direction arrows on the base of each model designed to assist with model identification and proper orientation.
- Walls -> Wall Thickness: 6.2 mm (this changes the Wall Line Count)
- If using Prusa Slicer -> Print Settings -> Layers and Perimeters -> Vertical Shells: Perimeters: 15 (= 6.2 mm wall thickness/0.4 mm nozzle)
- If using Bambu Studio or FLsun Slicer -> Strength -> Wall Loops: 15 (= 6.2 mm wall thickness/0.4 mm nozzle)
The wall thickness value is set to the average far cortex thickness for the tibial lateral diaphysis for non-obese, male adults.[12]
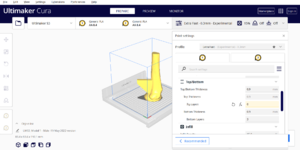
Since Models 1 and 2 are simulated fracture ends, then the Top Layers should be "0" for Models 1 and 2 to allow the tibial bone's interior anatomy to be exposed at each fracture end.
Do not change the Bottom Layers to "0" because this will make the base open at the bottom.
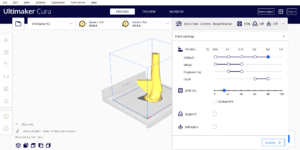
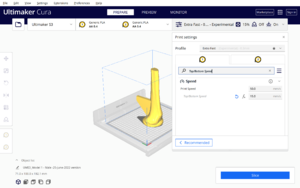
Do not increase the print speed beyond the slicer program's default generic (unmodified) settings for PLA. If the print speed is too high, it will cause filament drooping.[15] If you have previously modified the print speed values from the slicer program's default settings for PLA, please change the print speed values back to the default settings by clicking on the circular arrow to the left of each modified setting.
The Top/Bottom Speed is reduced to help ensure adhesion of the base of the model to the build plate during printing and minimize print failures.
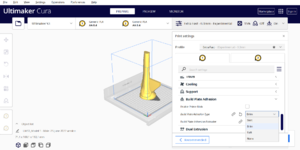
Do not select the "Raft" option because a raft will cover up the semi-engraved model number, gender symbol, and drilling direction arrows on the base of each model designed to assist with model identification and proper orientation.
Please proceed to the next step by clicking on this link or by clicking on the "Next" button in the Menu box in the upper right section of this page.
Acknowledgements[edit | edit source]
This work is funded by a grant from the Intuitive Foundation. Any research, findings, conclusions, or recommendations expressed in this work are those of the author(s), and not of the Intuitive Foundation.
References[edit | edit source]
- ↑ https://ultimaker.com/software/ultimaker-cura
- ↑ www.prusa3d.com/file/370474/technical-data-sheet.pdf
- ↑ Ultimaker. Ultimaker PLA Technical Data Sheet [Internet]. Ultimaker Support. [cited 2021 July 29]. Available from: https://support.ultimaker.com/hc/en-us/articles/360011962720-UltimakerPLA-TDS.
- ↑ Vian, Wei Dai and Denton, Nancy L., "Hardness Comparison of Polymer Specimens Produced with Different Processes" (2018). ASEE IL-IN Section Conference. 3. https://docs.lib.purdue.edu/aseeil-insectionconference/2018/tech/3
- ↑ Society For Biomaterials 30th Annual Meeting Transactions, page 332. Femoral Cortical Wall Thickness And Hardness Evaluation. K. Calvert, L.A. Kirkpatrick, D.M. Blakemore, T.S. Johnson. Zimmer, Inc., Warsaw, IN.
- ↑ https://support.ultimaker.com/hc/article_attachments/4800377696540/Ultimaker-ABS-TDS-v5.00.pdf
- ↑ https://support.ultimaker.com/hc/en-us/article_attachments/360026416800/ultimaker-PETG-SDS-v1.00.pdf
- ↑ https://support.ultimaker.com/hc/en-us/article_attachments/360010204279/SDS_CPE__v3.004-en.pdf
- ↑ https://support.ultimaker.com/hc/article_attachments/4800535847708/Ultimaker-CPE-PLUS-TDS-v5.00.pdf
- ↑ https://support.ultimaker.com/hc/en-us/article_attachments/4777237744540/Ultimaker-PETG-TDS-v1.00.pdf
- ↑ https://support.ultimaker.com/hc/en-us/articles/360012101319-How-to-store-material
- ↑ Maeda K, Mochizuki T, Kobayashi K, Tanifuji O, Someya K, Hokari S, Katsumi R, Morise Y, Koga H, Sakamoto M, Koga Y, Kawashima H. Cortical thickness of the tibial diaphysis reveals age- and sex-related characteristics between non-obese healthy young and elderly subjects depending on the tibial regions. J Exp Orthop. 2020 Oct 6;7(1):78. doi: 10.1186/s40634-020-00297-9. PMID: 33025285; PMCID:PMC7538524.
- ↑ Forrest AM, Johnson AE, inventors; Pacific Research Laboratories, Inc., assignee. Artificial bones and methods of making same. United States patent 8,210,852 B2. Date issued 2012 Jul 3.
- ↑ National Institutes of Health Osteoporosis and Related Bone Diseases National Resource Center. What is Bone? [Internet]. Bethesda (MD): The National Institutes of Health (NIH); 2018. [Cited 2021 Aug 17]. Available from: https://www.bones.nih.gov/health-info/bone/bone-health/what-is-bone.
- ↑ https://all3dp.com/2/3d-printing-overhang-how-to-master-overhangs-exceeding-45/

