UTC photovoltaic learning station
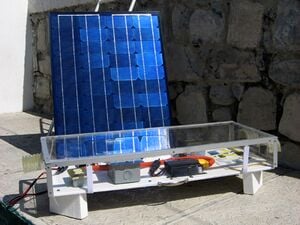
The students and faculty at la Universidad Technológia de Coahuila (UTC) are interested in learning more about photovoltaics. Located in Parras, Coahuila, this technology-oriented university has a three-year relationship with professor Lonny Grafman and Cal Poly Humboldt's appropriate technology program. Lonny provided a PV module, charge controller, battery, and inverter; these components and the desire to learn about PV provided the perfect opportunity to construct a small photovoltaic learning station. The goal of the project was to create a functional, convenient, portable, and instructional learning station and to ensure the involvement and sustained interest of UTC faculty. This station will be used by UTC students, the community and schools of Parras, and by future Humboldt State Parras Program students as a hands-on demonstration of photovoltaics. We aim to make the station attractive and informative to teachers, students, and potential consumers of this viable alternative energy. A concise list of our criteria for success includes:
- Functional – a learning station that does not work will be a negative example of this beautiful technology.
- Convenient – something that is readily available for use.
- Instructional – a product that will function as well as educate.
- Safe – the last thing we want is for someone to get hurt using the learning station, so we must cover all loose wires, terminals, etc.
- Attractive/"nifty" – it has to look good to reinforce the beauty of this technology.
- Portable – something that can easily be moved from location to location.
- Easy to use and maintain – we want to reduce the threat of damage by making it simple to understand and operate. If damage occurs, we want it to be easily repairable.
- Durable – we want this learning station to be able to sustain weathering as it is to be operated outside. Since it is portable, we want it to be able to sustain regular usage and movement.
- Adaptable to change if necessary – the needs of the University may change over time, so we want this learning station to be adaptable to power other devices as they wish.
Method, Materials, Budget[edit | edit source]
Many of the parts that make up the project were donated, which both limited the scope of our project and made parts shopping easier for us.
Donated Items:
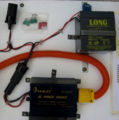
- Sunforce 7A/14.2V battery charge controller
- Long 12V/4.5Ah Deep Cycle Battery
- Samlex SI-175HP 175watt AC inverter (12V DC-15V AC)
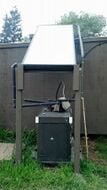
- GE PV-050MNA solar panel (50watt/17.3V/2.9A)
- voltmeter
- 15A fuse
- 100x110cm plywood
- Brackets
- Heat Wrap
- Plexiglass case with aluminum brackets
- door handle
- hinges
- conduit
Purchased Items:
| Item | Cost (~10.6 pesos = 1 US dollar) |
|---|---|
| 10A circuit breaker & box | 130 pesos |
| 10A-15Afuses | 60 pesos |
| 12 gauge wire (2m) | 20 pesos |
| Romex wire (.5m) | 30 pesos |
| DC plugs and outlets(2) | 25 pesos |
| AC outlet | 35 pesos |
| silicone | 25 pesos |
| oil-based paint | 70 pesos |
| nuts & bolts | 60 pesos |
| sand paper | 6 pesos |
| TOTAL | 461 pesos |
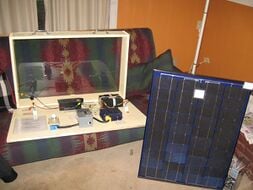
We drew up a design for the learning station and decided that it would be best to leave the solar panel separate so that people had the opportunity to move the system with as much ease as possible. We mounted the other system components to a piece of plywood with a drill and nuts & bolts. We then painted that with a white oil-based paint and put a hinged plexiglass cover over it for protection from the elements. The system isn't designed for prolonged exposure to heavy rain, but it will certainly last during those unexpected rain storms.
Locating the fuses we needed was a huge task. Finding anything between 10A-20A was difficult, so we went with what we could find. The 10A fuse was the only one we could find from an auto parts store in town, so we decided to go with that. 12 gauge wire was used because of the small amperage of the system. We used Romex for the AC side. We had one DC plug that went from the charge controller/battery parallel leg to the AC inverter. We needed another DC outlet because the UTC staff plans to hook up the system to run a small refrigerator. Since the refrigerator will run off of DC current, we spliced the outlet in parallel with the PV charge controller/battery so that they could have the option to use DC current without wiring directly to the battery. The circuit breaker prevents large surges from frying the system and anything that it might be powering. It took a while to locate one with a 10 amp capacity, but we did and were able to hook it up. The wall outlet is for any AC device that is going to be powered by the system.
The Curriculum[edit | edit source]
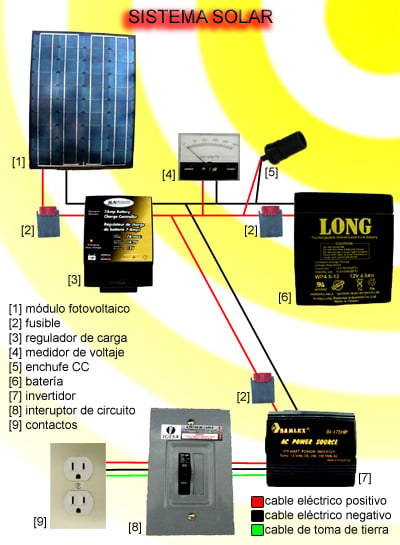
SOLAR SYSTEM
[1] Solar Panel - Converts solar energy into electrical energy.
[2] Fuse - Cuts the current when the amperage gets too high. It prevents the system from frying, but once it has fried, it needs to be replaced.
[3] Charge Controller - Regulates the voltage going in to the battery and prevents it from overcharging.
[4] Voltage Meter - Shows the voltage across the wires from the panels to the batteries.
[5] DC Plug - Allows you to plug in 12 volt DC appliances directly to the system.
[6] Deep Cycle Battery - Stores the energy for times when there is not much sun.
[7] Inverter - Converts the DC current produced by the panel to AC current.
[8] Circuit Breaker - Acts as a big fuse when the current gets too high for the system to handle. You can switch it back on when the system is ready again.
[9] Outlet - Allows you to connect AC appliances directly to the system. The energy can come from the panel directly, the battery, or a combination of the two.
Maintenance[edit | edit source]
- Total wattage of connected appliances should not exceed 100 watts
- Do not allow water inside the box
- Do not touch both battery terminals at once
- Do not allow battery voltage to drop below 12 Volts
- Turn off the inverter when not in use
- Charge the battery in ventilated area
- Remove any residue that collects around the battery terminals
- Clean the panel
- If system is not working, check the fuses, circuit breaker, or the inverter to see if they are functioning
- Replace any cracked or broken wires
- Check the silicon borders and hole awnings for durability
- Use bi-carbonate (baking soda) water to neutralize any lead-acid that might come out of the battery
- Don't smoke close to the system or expose to fire
- Do not operate in extreme weather conditions
Testing[edit | edit source]
The donated battery is old and hasn't been well cared for. Fully charged, the voltage is 13.4V (compared to 13.7-14.9 ideal operating voltage). It can run a 54W fan for about 33 minutes and holds about 2.575Ah. Teachers and students at the UTC are hoping to build a DC refrigerator and run it off the system. Unless a new battery is installed, this probably won't be possible.
Gallery[edit | edit source]
-
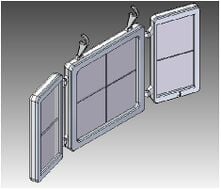
Fig 1: The hinged protective casing.
-
Fig 2: Aleiha with the system.
-
Fig 3: The system with its' protective casing closed.
-
Fig 4: Close-up of the DC outlet to the PV panel, the charge controller, and the voltage meter.
-
Fig 5: Close-up of the inverter, battery, DC plug and spare fuses.
-
Fig 6: Close-up of the outlet and circuit breaker.
-
Fig 7: Close-up of the entire enclosed system with diagram and maintenance guide.


