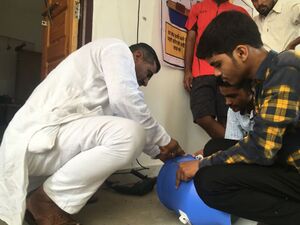
Tavelagarhi water product 2018
The program is a 10-week collaborative internship between Lady Irwin College in Delhi and Cal Poly Humboldt in California. A total of 16 students were selected, and divided into two teams of 8, one of which was sent to Tavela Garhi to work with the community and address environmental and social concerns.
Abstract[edit | edit source]
Together with the help and support of Environmental and Social Research Organization in Baraut, the American Center in Delhi, and the Center for Environmental Communication also in Delhi, our teams were able to conduct research and interviews within the rural village communities and develop environmental, social, and entreprenuership solutions. Below is a detailed documentation of the product subteam in Tavela Garhi. The work of the Tavela Garhi product team was made possibly through the Rural Youth Volunteers in India program.
Background[edit | edit source]
In the summer of 2018, sixteen students were chosen to participate in the Rural Youth Volunteers In India program. Eight students from Lady Irwin College in Delhi were paired with eight students from Cal Poly Humboldt in California and sent to Baraut, India to work in collaboration with Environmental and Social Research Organization (ESRO). The students were then divided into two teams so that they could focus on two different rural villages: Tavela Garhi and Doula. This page is dedicated to presenting the work of the Tavela Garhi team and specifically the product subteam, made up of two of the students from the eight person team. With the support of the American Center in Delhi and the Center for Environment Communication, the Tavela Garhi team was tasked with assessing the needs of the community and then working with the community to develop awareness and prototypes that could help the community address the environmental issue that was chosen. In Tavela Garhi, the issue chosen to be addressed was access to clean drinking water.
Research for the project was conducted by interviewing community members and then working with a selected group, to develop solutions in regards to clean drinking water. To the surprise of the community as well as the team, water tests of the water sources was found to be clean enough to drink! This changed the focus from developing water filtering technology to developing safe drinking water storage, as it was decided that the contamination of the drinking water was coming from somewhere other than the source. Together with the community, the product team developed five safe drinking water storage prototypes and presented these to the larger community through an educational fair. At the fair, interest was generated for the prototypes and people signed up to come to a workshop that would teach them how to make these storage devices themselves. One of the problems that the team worked on was creating affordable storage prototypes because while their are already safe drinking water storage containers available in the markets, they were quite costly, and very few community members used them. By teaching community members how to make their own safe drinking water storage devices, the team hoped that the community would develop entreprenuership opportunities by creating a business of making and selling affordable safe drinking water storage containers.
Empathy[edit | edit source]
In order to find out what the community of Tavela Garhi wanted to focus on, we relied upon an assessment done previously by the American Center in Delhi. This assessment conducted interviews in the community and found that the areas of concern for the village was access to clean drinking water to prevent water-borne illness, as well as access to reliable energy. At the start of our time in the community the team again conducted interviews and found that the village wanted to focus mainly on access to clean drinking water, as water-borne illness was a large concern for the community. In addition to conducting door-to-door interviews, we also invited community members to come to us and share their experiences or observations. Near the end of the project, the team held an education fair to increase awareness in the community, as well as a workshop to encourage entreprenuership within the community.
Interviews[edit | edit source]
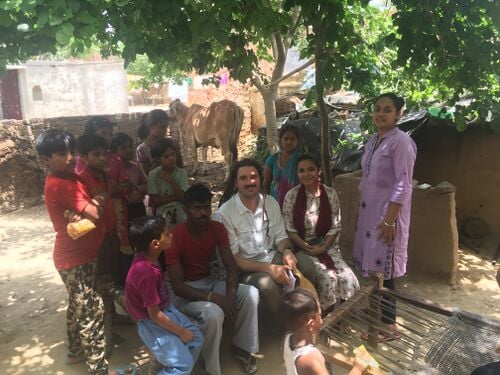
Interviews were conducted by going door-to-door within the community as well as inviting community members to come to our "classroom" where we worked in the community.
-
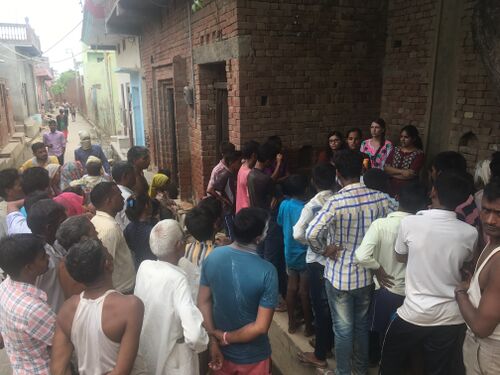
Door-to-door interviews
-
Community members coming to us
-
Community members in our classroom
Community meetings[edit | edit source]
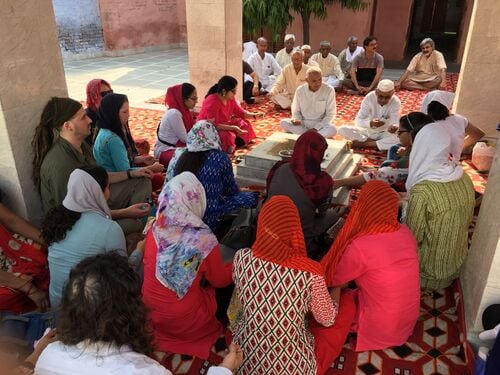
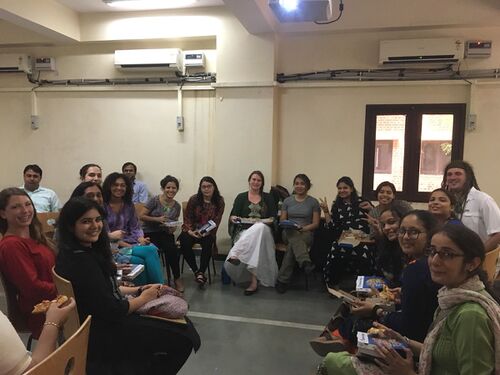
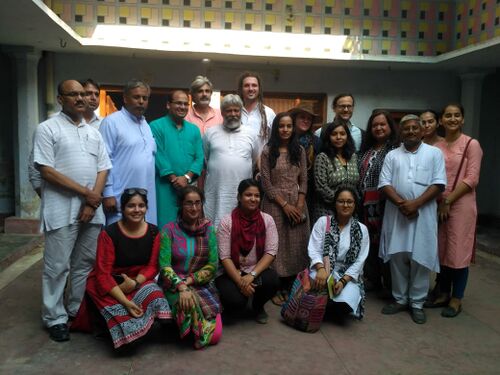
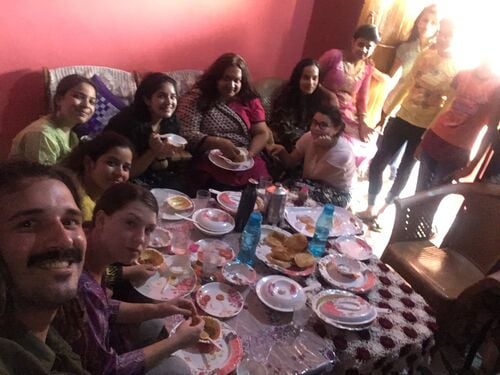
All the communities were very welcoming to us and many meetings involved a ceremony, some delicious food, and a photo!
-
Havan ceremonies were held before many meetings for good luck
-
Students and Faculty meeting at Lady Irwin College in Delhi
-
Meeting with the Waterman of India, who is working to solve water scarcity issues
-
Interviews often turned into meetings as interested people kept joining in
-
Many community members invited us to their homes for tea or lunch
Observations[edit | edit source]
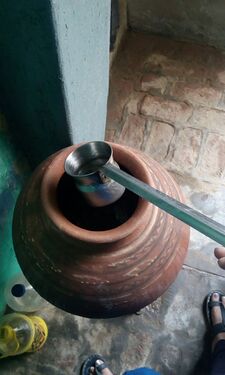
Observations were made during the entire empathy process including some surprising ones. One of the most surprising observations was that the drinking water, which was believed to be unclean by the community, was found to be clean and drinkable through the use of laboratory water tests. Another important observation was that the vast majority of village community members stored their water in open buckets and took water out of them by dipping a cup into the buckets, both likely sources of contamination.
-
Many drinking water storage containers had no lids and used a ladle to get water out, all possible sources of contamination
-
Community members were very interested in our safe drinking water storage prototypes
-
Sometimes finding supplies for our prototypes was very difficult
Literature Review[edit | edit source]
The following subtopics cover some of the main topics of research that made it into our final products.
Biosand filtration[edit | edit source]
Biosand filtration (aka slow sand filters) can be used to reduce fecal coliform in drinking water.[1][2]
Contaminants[edit | edit source]
Protozoa are a bummer.[1]
Rainwater catchment[edit | edit source]
Rainwater catchment is cool.[2]
Water quality[edit | edit source]
Water is life.[3]
Coursera.org
By enrolling and completed the "Introduction to Home Water Treatment and Safe Storage" we were given a crash course on small and large scale water treatment and storage. The course covered the most common water-borne illnesses caused by pathogens, protozoa, and viruses, as well as the best methods for removing each of these contaminants. Based on work and research from the World Health Organization, we were shown examples of water treatment and safe storage from around the world. One of the most applicable concepts we learned from this online series was that the most common source of water-borne illnesses worldwide is from unsafe water storage. This idea eventually lead us to the main focus of our project, especially after we found that the water sources in our community were not contaminated, yet people were still getting sick from water-borne illnesses.
Lonny Grafman's "To Catch The Rain"
Explaination of What We Learned:
- https://www.sswm.info/sswm-university-course/module-6-disaster-situations-planning-and-preparedness/further-resources-0/biosand-filter
- http://web.archive.org/web/20210118190236/https://www.biosandfilter.org/biosand-filter/
- https://www.ctahr.hawaii.edu/hawaiirain/Library/Guides&Manuals/CAWST%20files/Biosand%20Filter%20Manual_Version%2010_Sep%2009[1].pdf
- http://www.academia.edu/5455397/9_EFFECT_OF_DIFFERENT_STORAGE_VESSELS_ON_WATER_QUALITY
- https://digitalcommons.wku.edu/cgi/viewcontent.cgi?article=2208&context=theses
- http://citeseerx.ist.psu.edu/viewdoc/download?doi=10.1.1.494.1983&rep=rep1&type=pdf
Definition[edit | edit source]
Problem statement[edit | edit source]
The objective of this project is to assess and address the problem of access to clean drinking water in the rural village of Tavela Garhi. Upon testing the drinking water and finding it to be clean and drinkable, the objective changed from developing water filtration technology to developing safe water storage prototypes. The problem of access to clean drinking water concluded that contamination causing water-borne illness within the community must be coming from somewhere other than the source of the drinking water.
Criteria[edit | edit source]
Our criteria and constraints for safe drinking water storage containers was based on the need for the community to prevent the continuing preventable illnesses caused by drinking water contamination. While we all wanted the product to be environmentally sustainable, plastic containers proved to be the most sustainable option for the community. Additionally, as safe drinking water storage containers were already available on the market, cost effectiveness and the ability to store a families drinking water capacity became the most important criterion, otherwise, why would individuals want the prototypes.
| Criteria | Constraints | Weight (0-10) |
|---|---|---|
| Storage Capacity | ≥ 15-20 liters/day | 1 |
| Sustainability | Uses available resources
Improves environment |
8 |
| Desirability | Speed of delivery: ≥ 0.03 L/s
Aesthetics: ≥ earthen pot Interest: ≥ 33% of people show interest |
7 |
| Strengthens Local Economy | ≥ 15% community engagement
Creates local work |
4 |
| Replicability/Repeatable | Our team in < 10 weeks
Community teams w/ease |
5 |
| Cost Effective | Initial cost: ≤ 700 rp
Yearly cost: ≤ 50 rp/year |
2 |
| Safety | Meeting certain water quality specifications
Less people getting sick |
3 |
| Easy to Use | Easy to use and clean
Maintained by cleaning for 30 minutes per week |
6 |
Ideation[edit | edit source]
The ideation process for our safe water storage prototypes was a collaborative process between the village community of Tavela Garhi and ourselves as visitors in the community. After establishing the needs of the village, as well as the preferences of the community members as to what they wanted to focus on, we utilized online research and educational sources to learn all that we could about access to clean drinking water and how to store it and keep it clean into the future. At every step along the way, we consulted with the community, getting feedback on our research, listening to ideas from the community, and coming up with new solutions together. Some of these activities and resources are listed below:
- Brainstorming with groups of community members
- Brainstorming within our team
- Classroom learning with Professor Lonny and Professor Meenal
- Internet Research, including on Appropedia and the Home Water Treatment and Storage course on Coursera
- Reading literature such as "To Catch The Rain" by Lonny Grafman
Prototyping[edit | edit source]
The main process for prototyping could best be described as a collaborative "trail-and-error". While some of our first attempts indeed ended in failure, we addressed the shortcomings and learned from our mistakes and successes along the way. Some of the important milestones included:
- Community Assessments indicated that there were issues with access to clean water and reliable power
- Through community interviews, we decided to focus on access to clean water
- After much research and development, we narrowed down a number of water filtration technologies
- Conducted water testing through a laboratory
- Water results showed good news! The water from submersibles, hand pumps and the government supply are all relatively clean and drinkable!
Prototype 1: Ceramic Pot Water Filter[edit | edit source]
There are three sources of water for this community: submersible well pumps in households, hand-pumps distributed throughout the village streets, and government water that can be accessed through a pipeline. Before we were able to collect water samples and have these three sources tested, we relied upon community interviews that claimed that the water from these sources was contaminated and needed to be filtered. Using this data, we focused our efforts on making a water filtration device that could be made within the community from locally available materials. We visited a potter in the community who claimed that he would be willing to help us make a ceramic style pot filter, similar to ceramic pot filters used throughout the world. We thus began collecting the materials we would need to make these filters: earthen clay from surrounding agricultural lands, pre-fired bricks to mix with clay for grog material, and dried wheat husks for the combustable material in the mixture that helps make the correct pore space needed for filtration. We also visited a clay brick manufacturing plant and were granted permission to fire our ceramic pot filters there. When we returned to the community with these materials and permissions, we found out that the potter in the village did not actually make many or possibly any clay pots. He simply went to Baraut and purchased clay pots from the market there.
This lead us on a journey through Baraut to multiple clay pot stores, where we asked if anyone there knew of a potter that made these pots. We established that these clay pot resellers also bought the clay pots in their inventory from elsewhere. Upon more research, we found out that the clay pots that are in almost every household from Baraut to Tavela Garhi are manufactured in Delhi using machinery at a factory. It was also around this time that we got our water test results back from the laboratory and we discovered that the water from all three sources in the village were in fact clean enough to drink! This was good news to not only the community, but to us as well, although it meant that we were back to the drawing board to figure out where the water-borne illnesses were coming from.
-
Gathering clay from nearby agricultural fields
-
Gathering pre-fired bricks from brick yard
-
Collected materials for ceramic pot filter
-
Realizing there are no local potters left
Describe the results of each of the prototypes.
Prototype 2: Earthen Clay Pot Safe Drinking Water Storage[edit | edit source]
After conducting water testing in the village and concluding that the water was clean enough to drink without filtration, we went back into the community to figure out where the water-borne illness contamination could be coming from. We asked community members where how they stored their water, and it quickly became apparent that the majority of the community gets their water from one of the three sources (government, submersible, or hand-pump) and then stores it in either a clay pot, plastic oil drum, or plastic bucket, with a few storing it also in metal buckets. Very few households put lids on these containers though, and all of them used either a ladle or a cup or even their hands to extract water from these open vessels when needed. Thinking we had found our contamination source we decided to focus on creating safe water storage containers which would include: a tight fitting lid, a tap at the bottom for taking water out, and a narrow opening for filling but to discourage dipping hands or ladles into the containers. Additionally, the opening needed to be wide enough and the container not too large so that it could be easily cleaned weekly. We went back into the community and asked families how many people lived in their households and how much water they consumed in a day. It was determined that the average family consumed between 15-20 Liters of water per day, and thus we decided our safe water storage container should be able to hold this amount of water.
Although we wished to find a way to have the local villagers be able to make these containers using locally available materials, we had already established that there was no one around that knew how to make the earthen clay pots any longer. Although they used to be made in every village by a local potter, the industrialization of India had shifted the making of these traditional water storage devices to mechanized factories in Delhi. We were able to find a potter in Baraut however that still made the pots, and so we visited him to figure out if we could fix a tap to the clay pot without it breaking. We were actually successful in making our first clay pot safe storage device with a tap and a lid, but then some new information came to light. When discussing our prototype with local community members, we were informed that they liked the devices, however they claimed that every year the monsoon rains ruined the clay pots due to the high humidity. Thus, households that used these clay pots had to replace their pot every year after the monsoon season. We decided that this factor was enough that we should also come up with other safe drinking water storage prototypes that would last longer than one year.
-
Learning to attach a tap to clay pot
-
Found a 15 liter clay pot
-
Tools needed to drill a hole in clay pot
-
Finished earthen clay pot prototype (without the lid)
Describe the results of each of the prototypes.
Prototype 3: Plastic Bucket Safe Drinking Water Storage[edit | edit source]
After learning that the earthen clay pot storage device would have to be replaced every year after the monsoon season, we focused our attention on making safe drinking water storage containers from more durable materials. When we were out in the community conducting interviews and observational research, we noticed that the economic class and social caste of the households tended to dictate how they stored their water. Many households in the poor sections of the community stored their water in large plastic barrels, or other types of open plastic buckets. We decided that our first durable prototype should target this community, as their living conditions placed them at the highest risk for recontamination of drinking water. We purchased the cheapest but also safest plastic bucket we could find, that also included a lid and went to work putting our prototype together. In the end we had constructed a plastic bucket with a plastic tap that had a fixed lid that could be opened for filling and cleaning.
-
Getting ready to make our prototype
-
Our first durable prototype works!
-
Finished plastic bucket safe water storage prototype
Describe the results of each of the prototypes.
Prototype 4: Metal Bucket Safe Drinking Water Storage[edit | edit source]
After completing our plastic bucket prototype, we decided we should make a range of prototypes to target every socio-economic class that might be interested in making their drinking water storage safer. This lead us to purchase a 15 liter metal bucket that had a lid, and we attempted to fix a tap to it. Although we had limited equipment and materials, we were able to fix a plastic tap to this metal container as well.
-
Ready to drill our metal bucket prototype
-
Attaching a tap on the metal bucket prototype
-
Finished metal bucket safe water storage prototype
Describe the results of each of the prototypes.
Prototype 5: Milk Jug Safe Drinking Water Storage & Workshop[edit | edit source]
After completing our first 3 safe drinking water storage prototypes, we noticed that we had failed to incorporate an important design criteria for the container: the narrow opening to discourage use of ladles or hands, but wide enough to be cleaned weekly. With this in mind, we went back to the market in Baraut to conduct more research. After a few hot days walking the market and looking for a suitable container, we decided to purchase a 15 liter plastic milk jug. It met all of our criteria and even improved the tight fitting lid aspect, as all of our previous containers had lids, but they were not very tight fitting. After fixing a plastic tap to this milk jug container, we realized that we had made a safe water storage prototype that we could teach the community how to make, and possibly establish an entrepreneurial opportunity in the village of Tavela Garhi for community members to make and sell these safe drinking water storage containers. This milk jug container was also in the middle price range, which made it affordable for all the socio-economic classes within the village.
During our market research we also discovered that safe water storage containers already existed in the market, however they were fairly expensive and many people did not purchase them because of this. Thus, we edited our criteria to include the need for our safe water storage prototypes to be more affordable than the containers already sold in the market. The milk jug prototype met this criteria and was half the price of the pre-made safe storage containers on the market.
-
Getting community feedback on safe storage prototypes
-
Holding workshop on safe water storage construction
-
Instructing the first volunteer from the workshop
-
Community adults and kids learning together
-
Finished milk jug safe water storage prototype
Describe the results of each of the prototypes.
Prototype 6: Bio-sand Water Filter[edit | edit source]
After completing our safe drinking water storage prototypes, we visited a community very close by to the community we had been focusing on. It is still unclear if this outside community is part of the village of Tavela Garhi or not, as it is difficult to get a straight answer from any of the community members. Unfortunately, and to our dismay, many of the conditions we had expected to see in Tavela Garhi existed in this other nearby community. There was an extreme lack of access to clean water, contaminated water coming from the hand-pumps in the community, evidence of rampant water-borne illnesses, and an entire school of 80 children sharing a 20 liter container of drinking water over the course of an entire day. With this new information, we decided that we should design an affordable way for our community and this outside community to filter their water. While we could not change our focus to this community completely, we had hopes that by developing a water filtration device in one community it could be shared with other communities. Thus we used our previous research about water filtration and decided that a bio-sand water filter would be the most affordable and available option.
-
Working on our first bio-sand filter
-
Filtering sand for bio-sand filter
-
Washing gravels with community members
-
Learning to drill holes in PVC collection pipe
-
Finished bio-sand water filter prototype
Unfortunately, there were a few problems with our first bio-sand water filter. The first error was one that we made, in choosing not to use a bulkhead fitting where the PVC piping exited the bucket. We simply used M-Seal which is a locally available pipe joint sealant. While the original test run showed a leak, we were able to fix it by simply putting on another layer of M-Seal. Later that week, however, something or someone accidentally bumped into the externally exposed PVC pipe and the leak came back immediately. This incident made us reconsider the design of the filter, especially in the placement of the PVC piping. Meanwhile, we had already started work on an educational version of this prototype, which can be seen below.
Prototype 7: Bio-Sand Water Filter Educational Model[edit | edit source]
While we were making our first bio-sand water filter prototype, we were so sure of our design that we started working on an educational model to take to the educational fair, as the real thing was much to heavy to take anywhere. We wanted to be able to show the community members the technology of bio-sand water filtration.

While we were able to use this educational prototype in our educational fair, we also discovered that while there was no leak from the point of entry of the PVC piping, the PVC piping had become clogged to the point that water did not run through it. We believe this is due to a number of reasons relating to the small size of the prototype. The first is that the small size created a lack of adequate space for each layer (sand, small gravel, and large gravel), causing the sand to leak through the gravel layers and into the collection pipe. The second reason is that the small size of the prototype did not provide enough hydraulic head (area above the standing water and sand) to create enough pressure to push the water out and prevent clogging. Ultimately, although it failed to work properly, it was really never meant to, and so it met the requirements of being used as a visual model in our educational fair.
Prototype 8: Standing PVC Pipe Bio-Sand Water Filter[edit | edit source]
Our first bio-sand filter prototype had failed for a number of reasons. The first is that the height of the bucket did not allow for 50cm of filtration sand to be in it, which was our filtration goal to meet cleanliness and speed of outflow requirements. The second is that we realized that the speed of outflow was too slow for anyone to stand around and wait for their safe water storage container to be filled. With this in mind, we wanted to have enough hydraulic head space for someone to pour in all 15 liters of their daily household requirement, place their safe storage container under the outlet and then leave it overnight to be filled by morning. Additionally, to limit the possibility of outlet pipe breakage, we redesigned our filter to have the outlet piping on the inside of the filter body, and have the outlet closer to the standing water level. Thus, we went back to the market in Baraut to figure out what we could use for our new bio-sand filter. It was decided that a large diameter PVC pipe could be used for the filter body, and the largest we were able to find was 8 inches in diameter. We originally calculated the height of our filter to be 56 inches tall, allowing for 20 liters of hydraulic head space. However, after some feedback from the village community, we realized that this height would be difficult for people to pour water into the top of the filter, so we adjusted the hydraulic head to 15 liters bringing the height of the filter down to 46 inches. While we were able to successfully build this PVC pipe bio-sand filter prototype, it unfortunately takes about 3-4 weeks for the bio-layer to develop which makes the biological filtration aspect of the filter possible. We are currently waiting until the last possible day to test our filter, August 4th, and its ability to filter out E. coli bacteria.
-
Community members helping to build bio-sand filter
-
Learning to drill holes in PVC collection pipe with community members
-
Cleaning sand for bio-sand filter with community members
-
Finished bio-sand water filter PVC pipe prototype
Describe the results of each of the prototypes.
Tests[edit | edit source]
Tests were continuously conducted in and with the community to make sure our efforts would be accepted and desired by the community. Some of the testing was information based such as testing the water sources, while other testing was based entirely on community reaction and interest. These testing methods are described below:
Water Testing[edit | edit source]
To address the concern that the water sources in the village are contaminated, we called in a local laboratory that could test the water for us. We took samples from three sources: 1)Government water supply, 2)submersible pumps and 3)hand-pumps that are distributed throughout the community. To all of our surprise, the water tests came back showing that although the water had some 'nuisance' contaminants (basically hard water with lots of calcium deposit) it was indeed drinkable and could only benefit from slight organic filtration due to the possibility of fecal coliform colonies being present. These results changed the direction of our focus from water filtration to safe water storage, believing through observations and community information that any potential water contamination must be coming from activities and practices after the water was obtained from the sources.
-
Taking water samples from a submersible with the help of a local lab
-
Taking water samples from a hand-pump
-
Taking water samples from a government water supply pipe
-
Learning to use a field kit to test water ourselves
Street Rallies[edit | edit source]
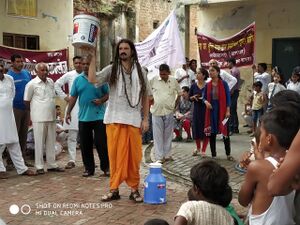
To test the interest of the community in safe drinking water storage, we held two street rallies to show our prototypes and talk briefly about the importance of safe water storage, and the consequences of not storing or using it safely. Additionally, our community engagement subteam used this opportunity to talk about water conservation practices and importance, and at the second street rally, they put on a short play to demonstrate the concepts.
-
Gauging community interest in safe water storage prototypes
-
Displaying prototypes after the play during the second rally
-
Water conservation play during second rally
-
First stop of the second rally, before a bigger crowd was attracted
-
School marching band helped us draw attention for rally
Educational Fair[edit | edit source]
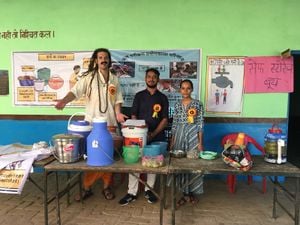
To showcase our safe drinking water storage prototypes and educate the community about the importance of storing and using water safely, we held an educational fair with the help of a local school. We included an educational model of a bio-sand filter prototype that we have been working on, even though we are still waiting for testing to show that it works. Along with displaying and talking about our safe water storage prototypes, we also had a game to demonstrate how it is harder for harmful bacteria and contamination to get into storage containers that had tight fitting lids. Additionally, we had a sign up sheet for a workshop to teach community members how to make their own safe drinking water storage containers. The community seemed very interested in the information and the prototypes and we got about 27 people to sign up for the workshop.
-
Performing water conservation play during educational fair
-
Talking to community members about safe water storage
-
Community members playing safe water storage game
-
Some of the many people that helped with the fair
-
Teachers from the school thanking us for the fair
-
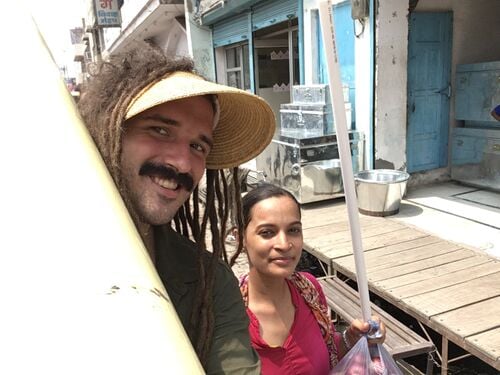
Many community members wanted a selfie with the safe water storage prototypes
Safe Water Storage Workshop[edit | edit source]
Although about 27 people signed up for the safe drinking water storage workshop, only about 17 people showed up for the event. This was still an acceptable turnout for the workshop, as our hope is that the community members that learned to make these prototypes will continue to spread the information and knowledge, and ultimately we hope that some community members will take it upon themselves to start an entrepreneurial venture in making and selling these containers to other communities.
-
Going over important safe water storage information to start the workshop
-
The first volunteer builder at the workshop
-
Workshop participants working together
-
Encouraging workshop participants to spread their new knowledge
-
Workshop participants won the completed prototypes in a raffle
Instructions[edit | edit source]
Troubleshooting[edit | edit source]
| Problem | Solution |
|---|---|
| Leaky Tap | Tighten the metal top piece of the tap |
| Clogged Tap | Dump out water, remove tap and clear blockage. Only put clean and clear drinkable water in storage container. |
| Foul taste or smell | Clean entire container with mild dish soap and water. Refill with clean and clear drinkable water. |
| Leak from tap fitting | Dump out water and remove tap. Check gaskets and smoothness of hole. Replace rubber gaskets or smooth out rough parts of container. Replace tap and fill with clean drinkable water. |
Lessons learned[edit | edit source]
- Check in with your team daily
- Check in with your community daily
- Address communications issues early
- Establish some type of leadership roles for your team before issues arise
- When inventing a widget, make sure that widget doesn't already exist in the local store
- If your invention does already exist in a local store, make sure your invention is an improvement in affordability or function
- Allow teammates to vent frustrations, but do not take their frustrations personally and never respond defensively
- Listen actively when teammates have concerns, ideas, frustrations, or other inputs
- Get community feedback early and often
Next steps[edit | edit source]
The next steps of this project involve checking in with the Core Team that was left in charge in the village to continue our work. Our hope is that one or many community members start an entrepreneurial venture having to do with safe drinking water storage. By either constructing these safe water storage prototypes and selling them, or retrofitting people's existing water storage containers with tight fitting lids and taps, a business can be started. Additionally, we hope that the Core Team helps to spread information about the importance of safe drinking water storage, and to take this knowledge to other communities and villages.
Team[edit | edit source]
References[edit | edit source]
- ↑ 1.0 1.1 "Introduction to Home Water Treatment and Safe Storage" by Coursera.org, WHO, and Swiss Federal Institute of Aquatic Science and Technology (EAWAG)
- ↑ 2.0 2.1 To Catch the Rain
- ↑ http://www.water.org
- http://www.academia.edu/5455397/9_EFFECT_OF_DIFFERENT_STORAGE_VESSELS_ON_WATER_QUALITY
- https://www.coursera.org/
- Lonny Grafman's "To Catch The Rain"
- https://www.sswm.info/sswm-university-course/module-6-disaster-situations-planning-and-preparedness/further-resources-0/biosand-filter
- http://web.archive.org/web/20210118190236/https://www.biosandfilter.org/biosand-filter/
- https://www.ctahr.hawaii.edu/hawaiirain/Library/Guides&Manuals/CAWST%20files/Biosand%20Filter%20Manual_Version%2010_Sep%2009
- https://digitalcommons.wku.edu/cgi/viewcontent.cgi?article=2208&context=theses
- http://citeseerx.ist.psu.edu/viewdoc/download?doi=10.1.1.494.1983&rep=rep1&type=pdf


