Straw Filter
Straw Filter[edit | edit source]
Project developed by Brad Revett (talk)
Abstract[edit | edit source]
Having an instant source of drinking water anywhere you can find water is a hard thing to come by in the developing world and while out backpacking in nature. This 3D printable straw filter should allow for cheaper and more readily available access to clean water at a lower price as most of the components of a water filter are things we come across every day. The main components of most survival water filters today are gravel, sand and activated carbon. These three things in addition to a cloth of some sort to keep the described things from going into our water are what make up a water filter that will filter out most of the harmful things.
-
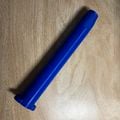
Fig 1: Assembled Straw Filter
-
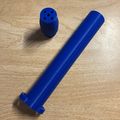
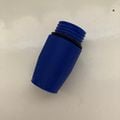
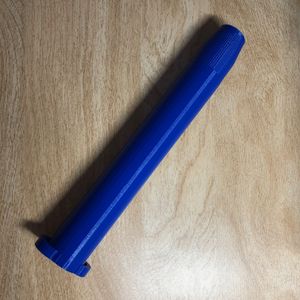
Fig 1a:Straw Filter 3D printed parts
-
Fig 1b: Straw filter 3D slicer/print orientation
Bill of Materials[edit | edit source]
- 3D printed bottom of the straw: Estimated cost is $0.62 based on 20$ for a 1kg roll of filament and an approximate use of 31g for the print.
- 3D printed top of the straw: Estimated cost is $0.30 based on 20$ for a 1kg roll of filament and an approximate use of 31g for the print.
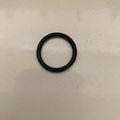
- 1 inch O-ring $0.11 from amazon [1]
- Sand from the beach sterilized with hot water $0.00
- Small pea gravel sterilized with hot water $0.00
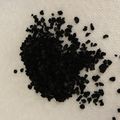
- Activated carbon: Estimated cost $0.38 based on $6.52 cost for 255g from Walmart and an estimate use of 15g. Alternative cost should be $0.00 from burning wood.
- Piece of cloth to keep materials in straw: $0.00 any piece of cloth laying around should work. Alternatives could include coffee filters or a purchased washcloth. 100 coffee filters for $1.50 from Walmart. Washcloths could be ordered from amazon $15 for 24 washcloths and only a small piece of the washcloth would be needed so the cost would be less than $0.10 per straw. [2]
Source Files[edit | edit source]
Source files can be found on youmagine here: [3]
Tools needed for fabrication of the Straw Filter[edit | edit source]
- MOST Delta RepRap or similar RepRap 3-D printer
- Fire for boiling water sterilization of parts and creation of activated carbon
Skills and knowledge needed[edit | edit source]
- If you used special skill – link to relevant wikipedia or wikiversity articles/courses
Technical Specifications and Assembly Instructions[edit | edit source]
Rinse all materials in boiling water before adding them to your filter.
-
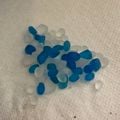
Step 1 add pea gravel to bottom of straw
-
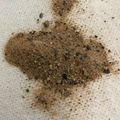
Step two add sand to straw
-
Step 3 add activated carbon to straw
-
Step 4 roll up cloth of some kind
-
Step 4 roll up cloth of some kind
-
Step 5 insert cloth into straw
-
Step 6 Add O-ring to straw top
-
Step 6 Add O-ring to straw top
-
Step 7 screw in the top to the bottom and enjoy
- Print time estimate: 3.5 hours total, 2.25 hours for bottom and 1.2 hours for the top.
- Assembly time estimate once all materials have been gathered: 3-6 minutes.
Print Settings[edit | edit source]
Filament feed rate: 105% Print temperature for PLA 210C
*Top of straw filter
- Layer height: 0.2mm
- Wall line count: 4
- Top and bottom layers: 4
- Infill density 25%
- Overlap percentage 10%
- Print speed: 50mm/s
- No print support needed
- Build plate adhesion: brim or skirt
*Bottom of straw filter
- Layer height: 0.2mm
- Wall line count: 4
- Top and bottom layers: 4
- Infill density 100%
- Overlap percentage 10%
- Print speed: 50mm/s
- No print support needed
- Build plate adhesion: brim or skirt
Common Problems and Solutions[edit | edit source]
- In slicing software rotate the top of the straw filter 180 degrees so that the threads are facing up to allow for a perfect print.
- Also in slicing software scale the top to 98% to allow a 2% tolerance for the threads.
Cost savings[edit | edit source]
- Estimated cost of total device: $1.41 from the Bill of materials above.
- Commercial equivalent costs $19.99 from Dicks Sporting goods [4]
- $19.99 - $1.41 = Cost Savings of $18.58 and a 92.94% savings.
Benefited Internet Communities[edit | edit source]
References[edit | edit source]
- How to make a survival water filter: https://www.wildernessawareness.org/articles/how-make-survival-water-filter</ref>
