How to make the Solar Bowling Oven
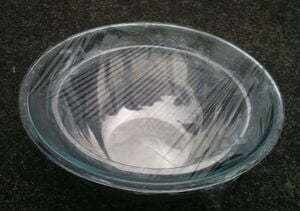
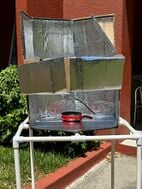
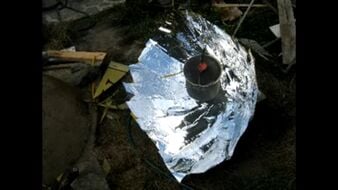
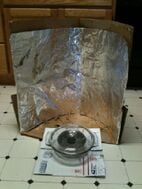
The Solar Bowling Oven involves two bowls placed inside each other with the inner bowl painted black on the outside. Each bowl is sealed with lids or saran wrap. The design also involves a reflector panel which is made out of a cardboard box and aluminum foil and bent into a parabolic shape.
Materials Before Construction[edit | edit source]
The required materials before construction of the Solar Bowling Oven are: big glass bowl, smaller cooking bowl, lids for both bowls or saran wrap, black electrical tape, aluminum foil, tape, an unfolded cardboard box (volume of box should be around 18"x18"x18"), and oven mitts.
Creating the Reflector Panel[edit | edit source]
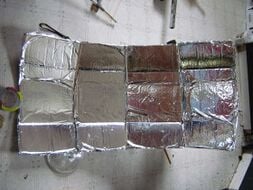
The first step in creating the solar bowling oven is creating the reflector panel. The cardboard box needs to have the top and bottom flaps unfolded. Then place the cardboard box on its side so that it lies flat, as seen in Figure 8a. Next, use scissors to make cuts 2 inches apart from each other on the two bottom flaps. The cuts should go up to the middle body of the box, as seen in Figures 8b, 8c, and 8d. After the cuts have been made, bend the cardboard box at the cuts marks on the bottom flaps so that creases can be seen in the cardboard all the way up the box, as seen in Figure 8e. Continue bending the box until the whole box curves in, as seen in Figure 8f. Then, prop the reflector panel up and make 2 cuts in the back flaps so the box can bend into a parabolic shape easier, as seen in Figure 8g. Next, bend the box into a parabolic shape by cinching the 2" cut tabs together and taping them in place, as seen in Figure 8h and 8i. Next, roll out long pieces of aluminum foil with the more reflective side up and tape the aluminum foil on the inside of the curved cardboard, so that it is as flat and reflective as possible, as seen in Figure 8j. The finished reflector should look like Figure 8k.
Creating the Solar Oven[edit | edit source]
The next step is to create the oven. First, paint the outside surface of the smaller cooking bowl with the black barbecue paint. The drying time for the black barbecue paint is typically one hour, but read the label's instructions for the specific drying times. If the inner cooking bowl comes with a clear lid, the lid is also covered with the black barbecue paint. After the black barbecue paint is dry, put the food that is going to be cooked inside of the smaller cooking bowl. If there is a lid accompanied with the smaller bowl, put the lid on with the food inside. If there isn't a lid accompanied with the smaller cooking bowl, cover the bowl with saran wrap with the food inside. Next, put the smaller cooking bowl inside of the big glass bowl and cover the top of the big glass bowl with a lid or saran wrap. If the lids or saran wrap don't provide a tight seal, use tape to ensure a tight seal. Figure 9a shows finished Solar Bowling oven with lids and Figure 9b shows finished Solar Bowling oven with saran wrap.
Cooking Time[edit | edit source]
After the Solar Bowling Oven has been created, place it in a sunny area. Angle the reflector towards the sun and place the Solar Bowling Oven in the middle of the reflector panel where most sunlight reflects off of it. Leave the reflector panel and oven in the sun for 2 hours, but times may vary depending on the amount of sunlight. When the temperature outside is 57°F with slight sun, the inner cooking bowl will reach 150°F within a half hour. After cooking, use oven mitts to handle the oven.

