
For overall convenience, relevant information from different visual and procedural methods to building your own thermal curtains have been integrated to one page. The texts have been written by different people at different times but all with the similar objective of providing easy-to-follow directions to minimize your heat loss, save you in heating costs and give you a wonderful appropriate-technology project. The more detailed procedure, found below, will provide extended benefit for those who learn better with diagrams than with the following photos and descriptors.
If you live in frigid dorms or just need a quick fix to a cold apartment, house or attic check out Quick and Dirty Thermal Curtains.
Why Use Thermal Curtains?[edit | edit source]
The Facts[edit | edit source]
In most homes, windows are the single largest avenues of heat loss. Glass is a very poor insulator, having an R-value of 1 (for single panes). Older windows can lose heat where the seal is degraded around the frame. Typical curtains alone provide little insulation from the cold outside, but using thermal curtains can increase the insulative value of your windows by up to 7 times (R-value of 7), keeping more heat in your home. Compared to other heat saving features, thermal curtains are simultaneously the most economic and efficient.
Not only are they helpful for your wallet and your carbon footprint, but typical thermal curtain design is fairly simple, the materials involved are affordable, and you will also save resources used in heating your home. Thermal curtains achieve the goal of effectively insulating your windows through both efficient and clever design and assembly. Making thermal curtains entails combining an insulative material, a vapor barrier material, and a cover material (this part is optional). The material needs to be attached to a hanging mechanism and sealed against the window frame to avoid air leaks around the curtain.
The Economics[edit | edit source]
Cost Comparison of Window Treatments
- Homemade thermal curtain-$40-70
- Custom made curtain (installed) $70-200
- Double paned window (installed) $150-500
The Science[edit | edit source]
To understand how window insulation works, it is helpful to know the roles of the thermodynamic principles of conduction, convection, and infrared heating. Concerning windows in a house, a pane of glass will conduct (lose) heat through the pane to the cold outside air. Conduction occurs due to heated (high energy) air particles naturally seeking to move to lower energy states (colder, less energetic air particles). When heat is lost by conduction from the air next to windows, the cooled air then sinks and pulls more warm air against the window. This process, called convection, establishes a continual current that will cool your home throughout the night. Infrared is heat from the sun that comes from light shining through your windows and warms your home. Even on a cloudy day, letting light shine through your windows will collect solar heat energy inside your home.
The Necessary Materials[edit | edit source]
- Insulative batting material (obtained through CCAT at Cal Poly Humboldt or ordered from Warm Windows.)
- Decorative cover material
- Wooden or metal curtain rod or dowel (Preferably a thin weight bar.25"-.5" in diameter. Note: this is not needed for a side draw design.)
- Curtain rod brackets or dowel brackets
- Curtain rings or shower curtain rings
- Velcro
- Sewing machine, thread, pins, scissors, tape measure
- Grommet punch set with grommets
- Fabric Scissors
- Mounting board (same horizontal length as curtain, 1" x 2"s work well. Note: this is not needed with side draw design.)
- Cap (serves to prevent a convection current by keeping air from flowing around the top of the window. Note: only needed if using a side draw design.)
The Procedure[edit | edit source]

Measure the windows to be treated with thermal curtains. Be careful on how you convert your measurements into the fabric yard.

Obtain the batting material and decorative fabric material. It is best if you can use recycled or sustainable material. Keep in mind that you want sturdy material that is not going to stretch or rip easily. Twill works best, while jersey is impractical. Wash the decorative fabric material before you fabricate your thermal curtains.

Cut the batting material and the fabric out according to the measurements of the window, giving an allowance of 2 inches around the perimeter of the decorative fabric material. Remember, it is better to be a little over than too short.

Pin the fabric on to the batting material so that it makes sewing easier. With the Warm Windows batting material, the fabric-side of the batting material must face the decorative-side of the fabric material.

Use a sewing machine to sew the fabric to the batting material. Sew three edges together and then flip the curtain to expose the exterior.

On the un-sewn edge, tuck the remaining material into the curtain and sew them together. This keeps the seam on the inside and makes the finished product look nice.

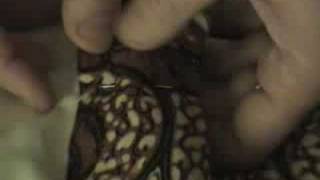
Make holes in the material along the top for the grommets to be put into.

Hammer the grommets into place.

This is what your grommets should look like.

Sew Velcro onto the sides of the curtain panels that need to be sealed onto the wall. Position and set Velcro on the walls relative to the position of the Velcro on the curtains. This allows for better insulation.

Install the curtain rod and hang up the curtains.

Slide the rod rings onto the hanging rod.

As you lift the rod onto the hooks above your windows, feel beautiful.

Be proud and show off.

Make curtain ties out of the extra material, if any, if you want to be able to tie the curtains back when not in use.
And Voila![edit | edit source]

Video demonstration[edit | edit source]
Tips[edit | edit source]
Measurement Considerations: Before fabricating thermal curtains for your home, you need to decide which windows you want to cover. In the northern hemisphere, north-facing windows and large windows release the most heat, therefore covering these windows will have the biggest impact. You need to measure the height and width of the windows. Be sure to keep in mind that you want your curtains to extend beyond the window in order to get best results.
Also note that the cold air on the window side of the curtains will flow downward, and the warm air inside the house will flow upwards. Because of this, you can help to prevent this cycling of the air (and thus cold drafts) by installing a pelmet above your curtains. The pelmet doubles to hide the curtain fittings (rail, etc.).
Alternatives to our Awesome Thermal Curtains[edit | edit source]
If you would prefer a different display of how to make thermal curtains, the following diagrams also are helpful. This can be done using one of three designs: side draw, roll-up or Roman shade.

Preparing Curtain Shades[edit | edit source]
For Purchase[edit | edit source]
The best already assembled thermal curtain fabric is a product called Warm Windows from The Warm Company (954 East Union St, Settle Wa. 98122). Their product combines several thin insulative layers (synthetic batting), a mylar vapor barrier layer and a thin canvas-like lining material all in one. To complete fabric for the curtain shade, just sew a decorative cover fabric over Warm Windows on the side, which faces the room (this is only for aesthetic purposes, and will not affect the performance). Warm Windows costs approximately $22/yard and comes in widths of 3.75 and 5 feet. It is for sale at CCAT, and sometimes available at major fabric stores.
For Construction[edit | edit source]
Alternately, you can make your own curtains using a combination of insulative synthetic material (such as old quilting batting or sleeping bag filler), coupled with a material that reflects heat and prevents water absorption (such as plastic sheeting), and a cover layer of fabric of your choosing.

Don't try to add a mylar layer yourself. It is extremely difficult to work with on a sewing machine, tears very easily, and is hard to find. Instead, find something that already has reflective material in it, (a good sleeping bag that someone is through with) and use plastic sheeting to prevent water absorption.
Always use synthetic material for the layer that comes in contact with the windows. This will prevent mildew caused by condensation on the window.
Cutting your fabric[edit | edit source]
When measuring your window, make sure to include the frame that holds the glass, and then add 2" to each side. If using the roll-up or roman shade design, add 6" to the top and 4" to the bottom (for the weight bar). This important step will ensure enough shade fabric to adequately seal your curtain to the wall in order to prevent heat loss thorough conduction and convection.
After you have acquired and cut your fabric, assemble it in a fashion so that the insulative layer of your curtain fabric would be facing the outside of the house and the vapor barrier layer would be facing the inside of the room. If you have several layers of insulation available, a layer may be placed on either side of the vapor barrier material. Sew lines of stitching through the fabric at 4" intervals, and then sew the edges clean on all sides. Sew in a weight bar pocket at the bottom of the curtain, if needed, and sew the weight bar into the pocket so that the bar does not fall out. Finally, sew your cover fabric onto the curtains onto the side facing the room.
Hanging your Curtains[edit | edit source]
Side Draw[edit | edit source]
Side draw is the most traditional design and involves the least hardware and sewing skill. They can be attached either in a shower curtain fashion, using a curtain rod and rings, or with a purchased pulley system. This design requires a wooden framed cap to prevent air from circulating behind the top of the curtain.
Roman Shades[edit | edit source]
Roman shades are often considered to be the best-looking curtain type. They are more difficult to assemble because they require the following steps. Sew enough "O" rings to your shade so that each quilting line gets an evenly spaced row of rings 8"-12" apart. Eye-screws (one for each vertical line of rings) and a curtain pulley are screwed into the mounting board, eyescrews matching up with the lines of "O" rings and the pulley on one side. Individual strings are tied to the lowest "O" rings on the curtain, fed up through the line of rings, through the eye-screws, and then down through the pulley. This allows the curtain to be drawn up with a pull of the strings. Wrapping the string around a curtain cleat on the wall holds up the curtain. Roman shades are attached to a 1x2 mounting board with either a staple gun or with Velcro. Velcro allows removal for periodic cleaning.

Roll-up Curtains[edit | edit source]
Roll-up curtains can be really easy or slightly difficult, depending on the method you choose. The curtain needs to be attached to a 1x2 mounting board with either a staple gun or with Velcro (Velcro allows removal for periodic cleaning). The easy way to install this design is to screw a small hook into the wall above the mounting board, and attach a loop of material to the back of the curtain (at the top center). In order to put the curtains up, you just roll them up by hand and put the loop over the hook to hold the curtain in place. The other method is nice looking and easier to pull up, although somewhat harder to install. First screw 2-3 eye-screws into the top of the mounting board and 2-3 into the bottom. Then screw a curtain pulley into the board on one side. Tie individual strings to each of the lower eye-screws. These strings wrap around the bottom of the curtain, up the front, and then through the eye-screws at the top of the mounting board. From there, they are fed through the curtain pulley. It is important to measure all of the strings with the curtain down. The curtain can now be pulled up with a pull of the strings. Wrapping the string around a curtain cleat on the wall holds up the curtain.

To clean your curtains you can dry clean, "wet" dry clean, hand wash, or use upholstery cleaners that spray-on and vacuum-off.
Don't ever dry clean thermal curtains if you make them with magnets as their backing glue will dissolve.
Sealing your Curtains[edit | edit source]
To be effective, your thermal curtain needs to be sealed tightly to the wall in order to stop air movement around the window. Sealing can be accomplished by using magnets, Velcro, sliding metal tracts, or small boards on hinges that clamp the curtain to the wall. Adding a weight bar, Velcro, or magnets to the base of the curtain will help hold it to the window.
Magnets need to be glued or sewn into the curtains. Corresponding magnets need to be attached to the wall. They can be painted to match the wall to be inconspicuous. Velcro has worked well for some and can be unobtrusive if the same color as paint, though it will eventually need to be replaced.
At CCAT, thermal curtains are sealed on the sides of the window frame with matching painted 1x2" boards that are about 2/3 the vertical length of the curtain. These boards are mounted on spring-loaded cabinet hinges, and close against the curtain to seal air circulation around the window. This last method has worked well at for years at CCAT.
For side-draw curtains, there is one last step to completing your thermal curtains. A cap must be created above your curtains in order to stop convection currents. This is typically made of wood, but could be plastic or sheet metal.
Glossary[edit | edit source]
Cap: used for side-draw curtains, this is a frame (usually wooden) the width of the curtain that extends from the wall above the curtain, over the top of the curtain, and over 12" of the front. It stops convection currents from forming around your curtain.
Conduction: the flow of heat through a material.
Convection: the flow of heat through currents in air. Forms loops where cooled air falls and warm air replaces it, the warm air cools and falls, drawing in more warm air.
Reflective Vapor Barrier: an aluminized plastic that reflects infrared heat and blocks water vapor.
R-value: a measure of how well a material resists the flow of heat, a common measure of insulation is a hole in the wall, is about 6" of fiberglass insulation.
Ending Note[edit | edit source]
This page was originally created by Kelly Muth of Eng 114 at Humboldt State. The other group members are Maria Hester, Heidi Halverson and Kelsey Knutson. Without them, the thermal curtains would not have been as awesome as they are. Thanks for everything! And a special thanks to Lonny Grafman, who taught an excellent class and taught me more than I possibly could know about whole earth engineering.
Subsequent edits have been made by Elena Flores and Alexandra McGee for ENGR 308. Such changes include incorporation of CCAT Thermal Curtains, which primarily was compiled by Lisa Murgatory and then edited by Eddie, Kendra and Krystal. Their resources include:
- Moveable Insulation, William Langdon. Rodale Press, Emmaus, PA. 1980
- Thermal Shutters and Shade, William A. Shurcliff, Brick House Publishing Co. 1980
- Insulating Window Shades, Ray Wolf. Rodale Press, Emmaus, PA. 1980
- Window Insulation, Bruce Anderson.
- www.warmcompany.com
Other edits include the embedding of a CCAT video, updated CCAT photos and general synthesizing of information.