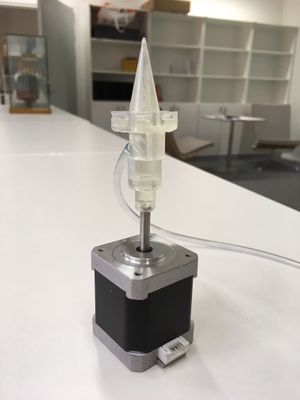
Extrusion head with an integrated screw and UV-diodes attachments

Project[edit | edit source]
Extrusion of UV-sensitive materials justs starts to be commerically available. A suitable extrusion head for experiments related to such materials (e.g. biomaterials & photoinitiator) can be seen in this concept study.
Concept
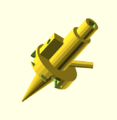
This extrusion head can be used for extrusion-based printing processes only. It has a nozzle diameter of 0.5 mm (changes can be conducted with open scad) and an integrated screw, which is attached to a motor and allows accurate extrusion. Additionally, this extruder head can be equipped with up to 4 UV-diodes to allow curing of UV-sensitive printing material. The whole component is designed as one part (non-assembly), suitable additive manufacturing processes are Stereolithography and probably metal- and plastic-based Powder Bed Fusion as well. The crucial factors for printablity are the accuracy level and the removal/existance of support structure. Functionality proved using Stereolithography, problems when using Fused Filament Fabrication because of inner support structures.
Bill of Materials
1) This is a non-assembly! only one part for the actual extruder head: The part can be found at the NIH Printing repository here
2) motor (outer shaft diameter of 5 mm)
3) tube (inner diameter of 4 mm)
Estimated Cost
Part cost of the original design: 25.50 € without shipment and needles. [1]
3D-printed substitute of this part with increased funcionality: 12.75 € using SLS, 21.15 € using SLA, without shipment [2], FFF would result in costs of less than 5 €, but funcionality cannot be guaranteed at this point.
Can be probably also printed as a metal-part (using metal-based Powder Bed Fusion, approx. 50 €). In general, funcionality compared to original design significantly improved: screw cannot pop-out, part more robust, UV-diodes can be added.
Directions
1) Print the part using SLA here(layer thickness 0.050 mm, clear resin, orientation as shown in the picture below), remove supports and post-process it in an alcohol bath and 1-2 h post-cure the component
2) Attach the part to a small motor (outer shaft diameter of 5 mm) and a tube (inner diameter of 4 mm)
3) buy diodes [3]and attach them to the extruder, connect them with each other apply energy
4) on the side of the part you will find a hole for fixations
Designer Niklas Kretzschmar, Aalto University
Parts[edit | edit source]
-
extruder head
-
visualization of the inner screw
Final Prints[edit | edit source]
-
Stereolithography, inside the printer
-
Stereolithography, after post-processing
-
Fused Filament Fabrication, inside the printer
-
Fused Filament Fabrication, after post-processing


