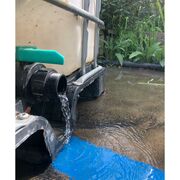
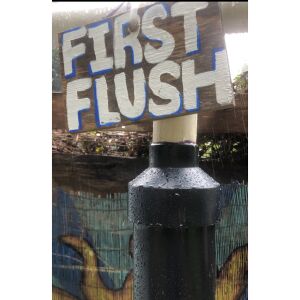
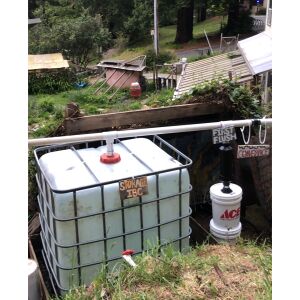
CCAT southside rainwater catchment
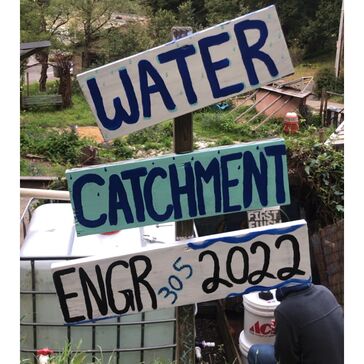
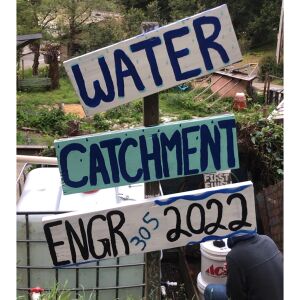
We are a part of Cal Poly Humboldt's Engineering 305 class of Spring 2022. This semester, we've worked on building a Rainwater Catchment System for the Campus Center for Appropriate Technology (CCAT). This project gave our team the opportunity to build our knowledge on calculating catchment and component sizes, while evaluating CCAT's water needs. The system is designed to water the onsite garden that has slowly become bigger every season. We hope to provide even greater access to water for CCAT, as well as access to knowledge of how our system has been built for years to come. CCAT's southside rainwater catchment system also pushes and practices new ideas for sustainability implementation. Water caught from CCAT's southside roof will be filtered before passing to the cistern. Any excess water that cannot be stored by the southside rainwater catchment cistern will be routed via overflow to the nearby CCAT green shed rainwater catchment system. This system is designed to capture and use as much rainwater as possible while mitigating rainwater waste as much as possible. We would like to acknowledge that this project was built on Wiyot land.
File:Inspiration to Harvest Your Own Water!.mp4
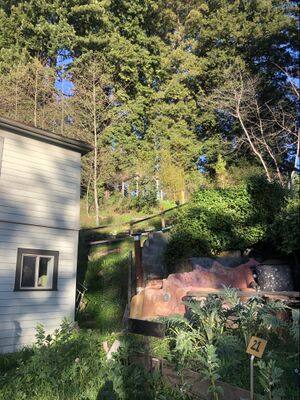
Background[edit | edit source]
The Campus Center for Appropriate Technology is a student-funded/managed home. Their vision is to teach students about sustainable practices through hands-on experiences. Appropriate Technology is a way of solving issues sustainably while recognizing social, economic, and environmental impacts. Amongst other projects, there are several rainwater catchment systems on the CCAT campus. These systems are making a positive impact by increasing the amount of preserved water that CCAT uses. Our group is honored to have the chance to create another rainwater catchment system for CCAT, that will further decrease their amount of city water usage.
Problem statement[edit | edit source]
The goal of this project is to build a rainwater catchment system for Cal Poly Humboldt's Campus Center for Appropriate Technology building (CCAT). Overall, the purpose of this project is to increase the storage of the facility's sustainable water supply as well as to make use of the facility's Southside roof.
Criteria[edit | edit source]
The following criteria will be used to evaluate all aspects of the project. After discussing the specifications of the project with our clients, our group chose these criteria to be most important. The scale ranges from (1-10), with 10 being the highest of importance.
| Criteria | Description | Weight (1-10) |
|---|---|---|
| Aesthetics | The system must look professional and part of CCAT culture. | 3 |
| Cost | The system must not cost more than the allotted budget. | 6 |
| Educational Value | The system must be accurately labeled. The system must be maintained and successfully used by any person associated with CCAT. | 4 |
| Functionality | The system must catch, filter, and store rainwater. The system must also provide adequate water pressure to teach around the CCAT premises. The system's cistern must be capable of storing enough water to water necessary vegetation | 10 |
| Safety | The system must be safe to use, walk around, and maintain. The system must be obvious to notice, to minimize any chance of safety concerns. | 8 |
| Sustainability | The system must be made using sustainable materials that are local, reliable, not too expensive, and easy to replace should they fail. The system must also sustainably and efficiently capture, store, and release rainwater. | 5 |
Literature Review[edit | edit source]
Rainwater catchment basics[edit | edit source]
There are many types of rainwater catchment systems that have different materials and structures. Although the cosmetics and functionality of the systems may be different, most include six basic parts. The catchment area, water channels, roof wash, storage, distribution, and purification. Different materials can be used for downspouts and gutters that include plastic, aluminum, stainless steel, etc. Schedule 40 PVC pipes, which have thinner walls are typically used for downspouts. Cisterns which are the storage containers for the rainwater come in a variety of styles. Materials of the cisterns can vary from plastic, metal, concrete, etc. Downspout filters/screens are used to sieve out debris from the storage tank. Products as simple as small screens to specially designed filters can be used as efficient ways to keep the water free of contaminants. Depending on the location and placement of the cistern, a pump may be necessary to access the stored water. Lastly, a purification system may be necessary depending on what you are using the stored water for. Potable systems, which are used for human consumption, require a purification system.[1]
Components
Pressure Treated Wood or Redwood - Used to construct the structure which houses the cistern. The wood used must be either redwood or pressure treated so that it may support the weight of a full cistern. Further, if not Redwood or pressure treated, the wood may decay over time due to natural decomposition and weathering.
Galvanized Brackets - Used to secure pressure treated wood together to reinforce structure under the weight of a full cistern. The brackets must be galvanized for reliability and security from weathering.
Cistern - The cistern is the storage container for captured rainwater.
PVC - Pipe used as conveyance for rainwater to travel from the gutter to the cistern.
Screen - Used to filter larger debris from passing into the cistern.
First Flush - Built with PVC, a PVC cap, and a PVC float ball. After being filtered with a screen, first rainwater (the dirtiest rainwater) will fill the first flush, causing the PVC float ball to rise. Once filled, the float ball will rise to the top of the first flush, allowing cleaner rainwater to pass into the cistern. Over time, the dirty first flush water will drain out of an appropriate-sized hole poked through the cap.
Pea Gravel - Used to cushion the added rainwater weight of the cistern to decrease the possibility of disturbing the ground beneath. The Pea Gravel is contained by the structure built using pressure treated wood or red wood.
Vibrating Plate Machine - Used to compact the ground beneath the cistern. Compacting the ground is essential to decrease the possibility of collapse. The Vibrating Plate Machine should also be used to compact the pea gravel before placing the cistern atop.
Catchment Area
Kinkade-Levario's book, Design for Water: Rainwater Harvesting, Stormwater Catchment, and Alternate Water Reuse,[1]elaborate on the many components of a rainwater catchment system. This book speaks a lot about how roof cleanliness should be the first step in starting off your water catchment system correctly. However, there are a plethora of methods to be used based on different conditions (Kinkade-Lavario, pg.34-62).[1] This book examines the possibility and best practices for different situations. The book clarifies that for non-potable use just about any non-porous roofing material can be successful in catching rainwater. Kinkade-Levario[1]goes on to talk about the best roofing materials such as metal, clay, and concrete for potable use water collection. Our methods will be for non-potable use, however, the actual methods and vocabulary of water collection are important to understanding this process from past research. The "endowment" of a catchment area is the total amount of water captured (Kinkade-Lavario, pg. 29).[1] To ensure the endowment is relatively clear of large contaminants, cleaning the gutters, and various pipes are preferred. However, a screen for leaves and debris on the top of the harvesting pipe system was found an extremely effective method for keeping out large debris.
Using a screen decreases a need for maintenance, as well as lowers mosquito population for potential areas of breeding. Indirectly, the screen can also reduce the chance of "flammable material", and lower the potential of having to use a ladder and something happening (Kinkade-Lavario, pg. 36).[1] The many benefits of a rainwater harvesting system motivate our research to develop the appropriate system for this environment. The use of screens, as well as a first flush system, will improve the water quality for the users.
Calculation
To assess water catchment creation, analyzing past projects is necessary even if they aren't the exact same environments. The journal article, Study of Rooftop Rainwater Harvesting for Typical Building in Nagpur, by Akinkya Parakar and Dr. P. B Nagarnaik,[2] examines a specific area called Nagpur in India, where there's an urgent need for water growing, as well as a solution to decreasing groundwater from scarcity in the community. Rainwater collection has been seen to assist both of these issues, which is why Nagpurs' implementation of these systems is beneficial. They examined the possibilities of rainwater harvesting for a common building in Nagpur city.
The first collection of rainfall data was compiled for the city to assess the average rainfall amounts, which was 1,122 mm. After this was available, they calculated the rooftop catchment area to be 1850 m2. Then they examined the "runoff coefficient"(Paratkar, pg. 2013),[2] which is represented by the surface of the catchment system. For example, a wet catchment area on green land is anywhere between 0.05-0.10, whereas in their project the roof was concrete making its coefficient 0.8 (Paratkar, pg. 2,014).[2] All of this variable collection allows us to calculate the harvestable rain. For their project their calculation was; 1,122 * 1850*.8= 16,60,560 liters that can be collected for a year. (Parakar, pg. 2,014).[2] The sample calculator of this project guides the calculations for our own projects. We will need to find out the various roof materials on the site, as well as calculate the average rainfall amount in Arcata. As elaborated in the journal article, planning out the system will allow for the maximum amount of water to be collected in order to solve the need for water at the Campus Center for Appropriate technology.
Storage
In a rainwater catchment system, cisterns are the containers for storing water. Cisterns are created in many diverse ways such as 1,000 gallon concrete-coated baskets built and used in Thailand (Hazeltine et Bull, 2003[3]). In the United States, the majority of cisterns used in residential applications are made of heavy plastic (Lubeck, 2010).[4] After being filtered by a first flush system and screen filter, rainwater flows into a cistern from above. The water is then stored in the cistern. Once needed, a valve will release the water. Water pressure output is naturally dependent on gravity but can be manipulated with a variety of tactics. Submersible pumps are commonly used to produce extra water pressure. ¾ hp submersible pumps provide good pressure though 1 hp submersible pumps are best for irrigating a large area (Lubeck 2010[4]). Elevation of the cistern also affects the output water pressure. Strategically placed above-ground cisterns are able to provide water pressure from gravity whereas below-ground cisterns must rely on a pump to fight gravity (Lubeck 2010[4]).
First Flush
Although rainwater harvesting is an efficient way to use water, it comes with the risk of contamination. Since the water that is collected comes from rooftops, it has the potential to come into contact with debris. Rainwater also has the potential of being contaminated with dust, smoke, and particles. This is why it's important to take caution by building a first flush system, especially for potable catchments. This first flush is designed to capture the initial rainfall that holds the most contaminants. From the rooftop the water will pass the first screen/filter, this will block the large debris from getting into the downspout. As the initial rainfall fills the smaller tank, a ball that is placed in the downspout rises and ends up closing off the passage, that way there isn't room for cross-contamination. After this happens, the cistern begins to fill with cleaner water. The first flush is used to avoid buildup within the tank, prevent odor and improve water quality.[5] When accounting for how large to make the first flush system, rooftops of 1,000 square feet or smaller, should have first flush tanks that are 5-10 gallons. Rooftops that are are 1,000 square feet or larger, 10 gallons/1,000 square feet.[6]
Purification
Rainwater caught from rooftops can be filled with dirt, grime, and debris that can be unhealthy for human consumption (Lubeck 2010).[4] The dirty rainwater can be filtered using a variety of methods such as a first-flush system and screen filters. Filters prevent large debris from flowing into the cistern. Screens can come in a variety of different sizes, but the 25micron filter is found to be more efficient than others (Swatha et al., 2020).[7] First-flush systems are considered to be extremely useful in removing the more concentrated settlements of debris (Swatha et al., 2020).[7]
Rainwater sustainability[edit | edit source]
Sustainable practices are becoming increasingly more imperative for a world being overcome by pollutants and degradation. In the book, Rainwater Tank Systems for Urban Water Supply by Ashok K. Sharma, Donald Begbie, and Ted Gardner,[8] analysis of rainwater harvesting in Canada has been practiced in rural communities for the necessary use of water. However, sustainability has urgent needs all over the world, making rainwater catchment systems necessary in some cases. Certain rainwater catchment systems are extremely useful as drinking water, in countries with low access to clean water. The structure of these systems has remained relatively similar over centuries (Sharma, Pg. 2[8]). In general, the same basics have remained similar in that it contains, a runoff area with gutters to guide the water to pipes where the collection containers are. However, there are currently questionable gaps that arise when it comes to Rainwater tank systems (Sharma, pg. 2).[8]The gaps that may be applicable to our research and project are; appropriate methods of maintenance and management, the treatment option available to supply rainwater that is fit for the intended purpose, and lifecycle costs associated with constructing and operating a rainwater system.
Appropriate methods of maintenance and management come with assessing what is around the catchment area such as trees, or possible debris to assess the possible uses of the water. Roofing material can also be a possible contributor to lower rainwater quality (Sharma, pg.10).[8] According to a study done in Australia, 65% of the total contaminate found in rainwater catchments across the country were, "crustal matter/sea salt, car exhaust/ road dust, industrial dust, and aged sea salt/ secondary aerosols"(Sharma, pg.8).[8] The many possible sources of contamination show that modeling the systems must be individualized to the local environment. File:Educational CCAT rainwater catchment M.mp4The treatment option available to supply rainwater that is fit for the intended purpose consists of evaluating how water is necessary for that area, as well as its necessary water quality for use. Rainwater harvest has become quite popular in the United States. Though the majority use is for irrigation, another 25% use the water for potable needs (Sharma, pg. 3).[8] However, much of this water is not tested for chemicals or various forms of contamination. The vast amount of people using water catchment systems increases the urgency for guidelines when it comes to water use (Sharma 2015).[8] However, for our research, our concentration will not be focused on purifying the water for drinkable use, because its intent is for agriculture. Our system will be built in California and the U.S. has a small amount of rainwater harvesting guidelines. This may work in our favor because we can use a plethora of methods, but it may increase the difficulty of knowing what is the right method of use. The further our research on past methods and management practices of rainwater harvesting, the great chance we have to sustain a practice that could reside at Cal Poly Humboldt for years to come. Understanding the lifecycle costs associated with constructing and operating a rainwater system is necessary for the longevity of its sustainability. A catchment system's efficiency or (cost-effectiveness) is decided by the various tank and catchment sizes, the necessary water, and the yearly rainfall amounts. Sharma references a cost-benefit ratio found that along with being a great resource of water for the community, it also put stormwater management at ease with the decrease of runoff (Sharma, pg. 293[8]). Though the CCAT infrastructure is not intended to help runoff, it may benefit the parking lot below, from flooding as much during heavy rainfall. For our project, the CCAT house has two catchment systems already built (one in function currently). Our third system is intended to provide easier access to the water as well as a larger supply. The issues we observed were the inconvenience of rainwater catchment areas as well as a need for more water due to more garden beds being built. Another benefit was found to be in local communities if the rainwater system was to be built for everyone, investment in it funds the community more and creates work for people.
Prototyping[edit | edit source]
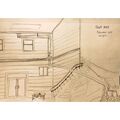
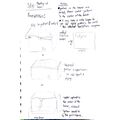
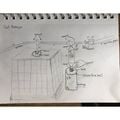
Our team met with facilities management to begin ideas for the water tanks placement. The sketches
-
This was our first sketch prototyping our area.
-
Our first meeting with facilities management about the gutters was held and these were the notes taken.
-
The actual site's set up was sketched once we bought all of the components.
-
First-Flush Volume Calculation. "Area-based rule of thumb" taken from Lonny Grafman's To Catch the Rain.
Construction[edit | edit source]
Beginning stages of the location site for the rainwater catchment:
Section 1: The house and various areas the cistern could've been placed.[edit | edit source]
-
Side of CCAT
-
Catchment area
-
Southwest corner of CCAT
-
Where the downspout will be installed
-
Old outdoor sink, that will be the new site our catchment tank
-
Southwest corner from the bottom
-
Closer look to front of the house
Section 2: The IBC tank we were able to get, as well as the cleaning process is shown here[edit | edit source]
-
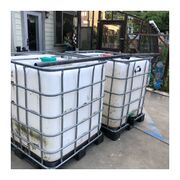
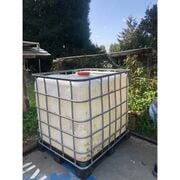
We found a a deal for two IBC containers for a very good deal, so we bought them. One for our project, and one for a later project at CCAT.
-
We separated the one we decided to use and began cleaning it
-
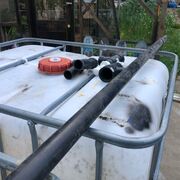
The piping and extra tubes came with the cisterns
-
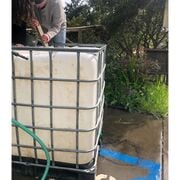
We first filled the tank with an organic soap, and let it sit for two days.
-
We then emptied the container, and filled it again but this time with baking soda
-
We used a stick to push out the small amount of sand left after the cleaning.
-
We finally emptied the cistern and got it ready to eventually be placed on the hill.
Section 3: Site preparation and constructing a base for the cistern[edit | edit source]
-
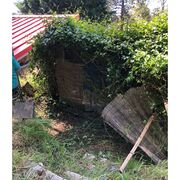
This was the staring photo of the site that our system would stay on
-
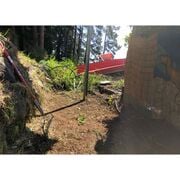
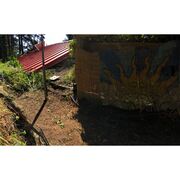
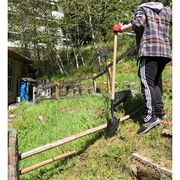
After a lot of pruning and clearing the site was almost ready to be used
-
Another angle of the site
-
Justin is shown here fixing the handrail down to the system
-
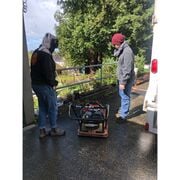
We rented out a Vibro-plate to compact the site
-
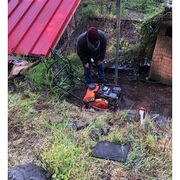
We compacted the ground
-
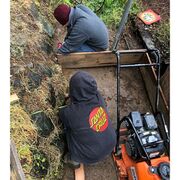
We built a frame and prepared the vibro-plate for a second round of compaction
-
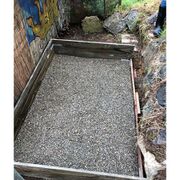
We filled our frame with pea gravel and flattened out
-
We used brackets and pressure treated wood for the frames strength
Section 4: This shows our final placements after all the preparation[edit | edit source]
-
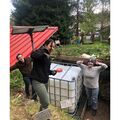
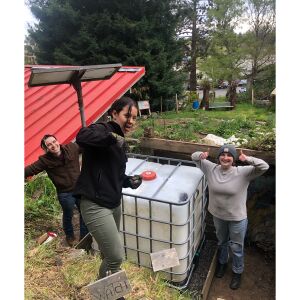
This shows Justin, Maddison and our friend Suzuki who helped us carry the cistern down to it's final position.
-
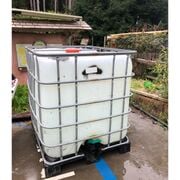
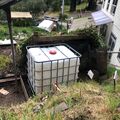
Final Position of the IBC tank!
Timeline[edit | edit source]
| CCAT Southside Rainwater Catchment System Schedule | |||
| Week | Estimated Date | Task | Status |
| 3 | 1/31-2/4 | Create Appropedia Website | Complete |
| 4 | 2/7-2/11 | Team Contract | Complete |
| 5 | 2/14-2/18 | Observations and Interviews | Complete |
| 6 | 2/21-2/25 | Alternative solution brainstorming / observations | Complete |
| 7 | 2/28-3/4 | Measurements / Calculations taken / Meet with Facilities | Complete |
| 8 | 3/7-3/11 | Blueprints drafted, system designed | Complete |
| 9 | Spring Break | Budget / Blueprints Approved | Complete |
| 10 | 3/21-3/25 | Prototype | Complete |
| 11 | 3/28-3/1 | Parts priced / Parts purchased | Complete |
| 12 | 4/4-4/8 | Site preparation | Complete |
| 13 | 4/11-4/15 | Site Finalization with Lonny and CCAT | Complete |
| 14 | 4/18-4/22 | Construction | Complete |
| 15 | 4/25- 4/29 | System test | Complete |
| 16 | 5/2-5/6 | System successful / Finalize Appropedia | Pending |
| 17 | 5/9-5/13 | Final Presentation / Evaluations | Pending |
Budget[edit | edit source]
Here is a list of the total items and costs for the CCAT Southside Rainwater Catchment.
| CCAT Southside Rainwater Catchment System Budget Proposal | |||||
| Quantity | Material Needed | Cost ($USD) | Tax ($USD) | Total Cost ($USD) | Source |
| 1 | 1 X 12 X 16 (Pressure Treated Wood) | 70.24 | 5.97 | 76.21 | The Mill Yard |
| 1 | Screws | 4.19 | 0.36 | 4.55 | The Mill Yard |
| 1 | Nails | 4.49 | 0.38 | 4.87 | The Mill Yard |
| 4 | Galvanized Brackets | 5.79 | 0.49 | 25.13 | The Mill Yard |
| 1 | Float Ball | 4.65 | 0.40 | 5.05 | CVS |
| 2 | 2" Flex Coupler | 8.24 | 0.70 | 17.88 | Ace Hardware |
| 1 | 2" PVC Elbow | 5.41 | 0.46 | 5.87 | Ace Hardware |
| 1 | 1.5' 2" PVC Pipe | 3.52 | 0.30 | 3.82 | Ace Hardware |
| 10 | Bags of Pea Gravel | 5.91 | 0.55 | 64.59 | Piersons |
| 1 | Food Safe Lid | 12.89 | 1.19 | 14.08 | Ace Hardware |
| 1 | Gasket Basin | 3.45 | 0.32 | 3.77 | Piersons |
| 1 | Doctor Bronner Soap | 10.99 | 0.93 | 11.92 | North Coast Co-op |
| 1 | Silicon All Purpose Cleaner | 11.64 | 1.08 | 12.72 | Ace Hardware |
| 2 | 5 Gal Bucket | 5.94 | 0.50 | 12.89 | Ace Hardware |
| 2 | Plastic Lid | 4.24 | 0.36 | 4.60 | Ace Hardware |
| 2 | 2" Bulkhead | 11.69 | 0.99 | 25.37 | Ace Hardware |
| 1 | PVC screw | 1.43 | 0.12 | 1.55 | Ace Hardware |
| 1 | PVC Ball Valve | 11.69 | 0.99 | 12.68 | Ace Hardware |
| 1 | Thread Hose Adapter | 16.19 | 1.38 | 17.57 | Ace Hardware |
| 1 | 2" Holesaw Blade Attachment | 17.09 | 1.45 | 18.54 | Ace Hardware |
| 1 | PVC Couple | 7.73 | 0.66 | 8.39 | Ace Hardware |
| 1 | PVC Couple | 1.61 | 0.14 | 1.75 | Ace Hardware |
| 1 | Thread Seal Tape | 1.61 | 0.14 | 1.75 | Ace Hardware |
| 1 | Holesaw Blade | 18.99 | 1.61 | 20.60 | Ace Hardware |
| 1 | Flush Valve | 7.79 | 0.66 | 8.45 | Ace Hardware |
| 1 | Vibrating Plate Ground Compactor | 49.16 | 4.18 | 53.34 | Don's Rent-All |
| 2 | Cistern | 200.00 | N/A | 200.00 | Private Purchase |
| 1 | 2X10 Pipe | 26.40 | 2.24 | 28.64 | Ace Hardware |
| 1 | Galvanized Flashing | 15.83 | 1.35 | 17.18 | Piersons |
| 1 | 2" to 4" PVC Adapter | 2.33 | 0.20 | 2.53 | Ace Hardware |
| 1 | PVC Bushing | 6.29 | 0.53 | 6.82 | Ace Hardware |
| 1 | 2" PVC Tee | 11.69 | 0.99 | 12.68 | Ace Hardware |
| 1 | 3" to 2" Coupler | 3.23 | 0.27 | 3.50 | Ace Hardware |
| 1 | PVC Cement / Primer | 11.69 | 0.99 | 12.68 | Ace Hardware |
| 1 | Pipe Cutter | 32.39 | 2.75 | 35.14 | Ace Hardware |
| 1 | PVC Pressure Pipe | 17.09 | 1.45 | 18.54 | Ace Hardware |
| 3 | 10ft 3" PVC | 13.99 | 1.19 | 49.91 | Ace Hardware |
| 1 | 3" PVC Cap | 9.99 | 0.85 | 10.84 | Ace Hardware |
| 1 | Roll of 84 in. x 36 in. Charcoal Fiberglass Screen | 12.78 | 1.09 | 13.87 | Ace Hardware |
| 3 | Bag of Cement Mix | 10.99 | 0.93 | 35.77 | Ace Hardware |
| 1 | 3/4" Valve | 2.00 | N/A | 0.00 | Donated |
| 1 | 3/4" Bulkhead | 17.28 | N/A | 0.00 | Donated |
| 1 | VibroPlate Rental | 45.00 | 4.16 | 49.16 | Don's Rent-All |
| 1 | Roll of Aluminum Flashing | 14.49 | 1.34 | 15.83 | Piersons |
| 1 | Box of Baking Soda | 7.99 | 0.74 | 8.73 | Ace Hardware |
| 1 | Silicon Sealant | 10.19 | 0.86615 | 11.05615 | Ace Hardware |
| 1 | 10' of 4" ABS Pipe | 25.91 | 2.20235 | 28.11235 | Ace Hardware |
| 1 | 2' X 4' ABS Coupler | 12.69 | 1.07865 | 13.76865 | Ace Hardware |
| ($USD) Total: | 959.77 | ||||
Operation[edit | edit source]
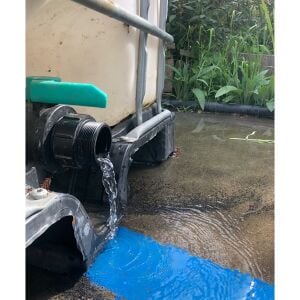
This rainwater system collects water from the Southside of the CCAT building. The rainwater travels through the gutters and the PVC pipes, which is also known as conveyance. The first flush is what diverts the first portion of the rainwater from the cistern. This is done to redirect the dirtiest portion of the water to prevent contamination within the cistern. Once the first flush is filled, then the water will be directed into the cistern. In between the gutter downspout and the conveyance is a screen, which blocks out any debris from entering. The cistern has an attached PVC pipe near the top known as the overflow, which will let out any excess water. The valve that is placed on the front of the cistern will allow the water to come out to be used as necessary. The photos below will show how the rainwater system functions step-by-step.
Maintenance Schedule[edit | edit source]
- Weekly
- Check Cistern for algal growth
- Check site for excess leaking
- Monthly
- Check Screen for debris buildup
- Every 3-5 years
- Clean First Flush and replace lid with new lid
- Check on Float Ball and replace if necessary
Instructions[edit | edit source]
File:Instructional CCAT Water Catchment.mp4
We used an organic soap to fill our container completely. We then drained the system and added 2 pounds baking soda. The IBC container is translucent so algae will grow slowly, but surely. To ensure water is being collected in a clean manor, cleaning and draining will be a necessary precaution
The first flush component will catch the dirtiest portion of water. The drainage area for this will be continuous, however debris may get in the way and block it. If the first flush is not draining, cleaning it first will be the priority. Our team had to buy new lids and drill new holes into the tops every time we took them off because they need to be water tight.
Conclusion[edit | edit source]
Testing results[edit | edit source]
The system successfully carries water through the conveyance, and into the first flush where the water drains slowly through the slightly open ball valve. The first flush is able to fill under a heavy rainfall, allowing water to successfully pass into the cistern. Once the cistern is full, the water is able to successfully pass through the overflow conveyance to fall onto the rooftop of the CCAT tool shed. This overflow is able to be caught by the CCAT tool shed's rainwater catchment system for a more sustainable rainwater catchment process. There were, however, a few leaks. Two leaks were found to come from both of the bulk heads attached to the lids of the 5 gallon buckets used for the first flush. The leaks were minimal enough that they will not affect the site or the function of the first flush or rainwater catchment system as a whole.
Discussion[edit | edit source]
We are happy to see our design working successfully. We found that there are a few leaks in our design having to do with our bulk heads specifically. Some of the leaks were fixable, and some of them not as easily fixable, given the time constraints of the project.
Lessons learned[edit | edit source]
We were able to fix some of the leaking spots using extra rubber washers or tightening the threaded pieces. Our team has learned that prototyping and testing the designs are extremely important steps when designing a project of this caliber. We also learned to picture the changes to the project's design before implementing them to ensure that we are not wasting materials or money. We also learned that the cistern's structure should be built using flexible wood that is resistant to weathering. Previously, we had built the structure with local wood. It was explained to our team that as the cistern increased in weight due to added rainwater, the weight of the structure would sink into the pea gravel, causing the structure's strength to be put to the test. Using either redwood or pressure treated wood solves this issue as these woods are strong and flexible enough to resist time, and pressure.
Next steps[edit | edit source]
This system is still lacking a proper downspout from the southside of the CCAT building. Once a downspout is installed, and conveyance is ran to our cistern, the rainwater catchment system will be fully functional.
Troubleshooting[edit | edit source]
| Problem | Suggestion |
|---|---|
| Leak | Tighten or replace part |
| First Flush not Draining | Make sure the drainage tube is not crimped |
| First Flush not Filling | Make sure the drainage ball valve is only SLIGHTLY open and not fully open or closed. |
Team[edit | edit source]
Spring 2022[edit | edit source]
- Maya Branch
- Maddison Ficovich
- Justin Purdy
*Thank you to Lonny Grafman for your guidance and knowledge*
References[edit | edit source]
- Bull, C., and Hazeltine, B. (2003). Field Guide to Appropriate Technology, Academic Press, San Diego, USA[3]
- Kinkade-Levario, Heather. (2007). Design for Water: Rainwater Harvesting, Stormwater Catchment, and Alternate Water Reuse. Gabriola Island: New Society Publishers, Limited. ProQuest Ebook Central.[9]
- Lubeck, A. (2010). Green Restorations: Sustainable Building and Historic Homes, New Society Publishers, Gabriola Island, Canada[4]
- Paratkar, Ajinkya, and. Nagarnaik, Dr. P. B. "STUDY OF ROOFTOP RAINWATER HARVESTING FOR TYPICAL BUILDING IN NAGPUR". International Research Journal of Engineering and Technology (IRJET), Volume: 07 Issue: 05 (May 2020): Page 2,011-2,014. https://www.irjet.net/archives/V7/i5/IRJET-V7I5388.pdf[2]
- Sathian, K., and Swatha, V. (2020). Purification System for Roof Water Harvesting.[7]
- Sharma, Ashok K., Begbie, Donald, and Gardner, Ted, eds. (2015). Rainwater Tank Systems for Urban Water Supply. London: IWA Publishing. ProQuest Ebook Central.[8]
<references>
<references>
- ↑ 1.0 1.1 1.2 1.3 1.4 1.5 Kinkade-Levario, H. (2007). Design for water rainwater harvesting, stormwater catchment, and Alternate Water Reuse. ProQuest Ebook Central, New Society, Gabriola Island, B.C.
- ↑ 2.0 2.1 2.2 2.3 2.4 Paratkar, Ajinkya, and. Nagarnaik, Dr. P. B. "STUDY OF ROOFTOP RAINWATER HARVESTING FOR TYPICAL BUILDING IN NAGPUR". International Research Journal of Engineering and Technology (IRJET), Volume: 07 Issue: 05 (May 2020): Page 2,011-2,014. https://www.irjet.net/archives/V7/i5/IRJET-V7I5388.pdf
- ↑ 3.0 3.1 Bull, C., and Hazeltine, B. (2003). Field Guide to Appropriate Technology, Academic Press, San Diego, USA
- ↑ 4.0 4.1 4.2 4.3 4.4 Lubeck, A. (2010). Green Restorations: Sustainable Building and Historic Homes, New Society Publishers, Gabriola Island, Canada
- ↑ Novak, C. A., DeBusk, K. M., van, G. E. G., and G., V. G. E. (2014). Designing rainwater harvesting systems: Integrating rainwater into building systems. ProQuest Ebook Central, John Wiley & Sons, Incorporated, Hoboken, NJ.
- ↑ Kinkade-Levario, H. (2007). Design for water rainwater harvesting, stormwater catchment, and Alternate Water Reuse. New Society, Gabriola Island, B.C.
- ↑ 7.0 7.1 7.2 Sathian, K., and Swatha, V. (2020). Purification System for Roof Water Harvesting
- ↑ 8.0 8.1 8.2 8.3 8.4 8.5 8.6 8.7 8.8 Sharma, Ashok K., Begbie, Donald, and Gardner, Ted, eds. (2015). Rainwater Tank Systems for Urban Water Supply. London: IWA Publishing. ProQuest Ebook Central.
- ↑ Kinkade-Levario, Heather. (2007). Design for Water: Rainwater Harvesting, Stormwater Catchment, and Alternate Water Reuse. Gabriola Island: New Society Publishers, Limited. ProQuest Ebook Central.
