Zane Middle School upcycled cornhole boards

Abstract[edit | edit source]
Our team, Bob the Builders, have created upcycled cornhole boards for Zane Middle School to display unique ways to reduce, reuse, and recycle. These boards are made of upcycled materials including metal, wood, and hardware. These boards will show students that recycling can be fun, creative, impactful, and limitless.
Background[edit | edit source]
Cornhole is a game made up of: a board with a hole/holes in the middle that is touching the ground on one side and a few inches above the ground on the other side, and cornhole bags made of cloth filled with beans or dried corn. The objective of the game is to toss the cornhole bag through the hole on the board. Our client is Katelyn Fox, a teacher at Zane Middle School. She thought that cornhole would be a fun and educational game for the students at Zane. The cornhole would serve as a game for students during Ms. Fox's class, and possibly other times such as P.E. or lunch.
Problem statement and criteria[edit | edit source]
The objective of the up-cycled corn hole boards is to give the students a new game to play during recess or P.E. The boards also show the students the importance of recycling and what recycled objects can be used for.
| Criteria | Weight | Constraints |
|---|---|---|
| Safety | 10 | Nonhazardous, Smooth Surfaces |
| Durability | 10 | Robust for >2Years |
| Portability | 9 | 2 Kids or 1 Adult |
| % Recycled | 8 | 50% Each Board |
| Fun Factor | 7 | Retain Children's Interest |
| Aesthetics | 5 | Presentable on School Grounds |
| Costs | 4 | Budget less than $400 |
Final Project[edit | edit source]
Prototyping[edit | edit source]
For the prototyping of the cornhole boards and transportation cart we used multiple different methods with different meanings. The wood board had a prototype to test the angle of the cuts for the legs, this ensured that the board would stand correctly with the right height so the game could be played correctly. The metal board had prototyping to test how the metal could be applied to the wood board, and how it could be curved around the edges to avoid the sharp edge the metal has, and increase safety. The second wood board had a paper mache prototyping to test if a stronger type would be strong enough to use for a cornhole board, which ended up being too weak for our purpose. Lastly, the transportation carts prototyping was done to establish the right dimensions, which was later used as a guide to building the real one.
Costs[edit | edit source]
| Material | Source | Cost ($) | Total ($) |
|---|---|---|---|
| Zinc Nails | The Home Depot | 1.30 | 1.30 |
| Epoxy Quick Setting Adhesive | The OT Store | 7.04 | 8.34 |
| Handtruck | Hensel's Ace Hardware | 53.70 | 62.04 |
| Zip Ties | Hensel's Ace Hardware | 10.72 | 72.76 |
| Metal Signs | Arcata Scrap Yard | 60.00 | 132.76 |
| Total Cost | $132.76 | ||
Testing Results[edit | edit source]
Has not yet been tested with middle schoolers; adults have enjoyed thoroughly!
How to build[edit | edit source]
A) Collecting supplies
- Get some form of material you can make the front of a cornhole board with. For example: plywood, any kind of wood sheet or palate, a plastic sheet, a metal sheet, reused street sign, plexiglas sheet.
- Get materials for the legs of the board. You will need some material to make the two legs of the board out of. The legs can be made out of the same type of material as the board, or a different material. Keep in mind the legs are usually between four inches and a foot long/high.
- Get materials for adhering the legs to the sheet. A strong glue, hardware, a welding system, or other bonding agent will do.
- Get tools needed to create a hole between five and ten inches diameter. (if a hole does not already exist). For example: various saws, laser cutter, water cutter, a big knife, etc.
- Get materials and/or tools for making cornhole bags. To fill the bag some sort of bean, grain or pebble works well. For the bags themselves, anything on the range of a tied off sock full of beans, too a three layer sewed bag will work. Here are some examples of bag making: sewing cloth, tying a sock, multi layered ziploc bags (glued closed), bag o' beans direct from the store. The best method is probably sewn, and any sturdy cloth can be used. For sewing you will need a needle and thread, or a sewing machine.
B) Assembling the board
- Create the hole in the board
- Attach the legs
- Make bags
- Decorate and have fun!
Maintenance[edit | edit source]
Because the boards will be used almost daily by young kids, they will need some light maintenance. The maintenance is important to keep up because its mostly based on the safety of the boards.
- Monthly
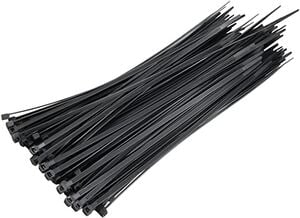
- Renew Zip Ties
- Check if the wood on the boards and cart are still smooth
- Every 2 and a half years
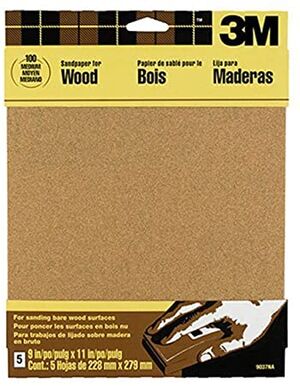
- Re-sand the wood on the boards and cart
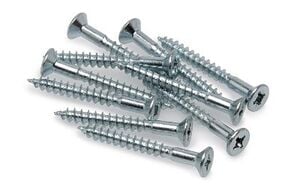
- Change the old screws to new ones
Images[edit | edit source]
| Replacing Zip Ties | Sanding Rough Edges | Replacing Screws |
|---|---|---|

|

|
 |
Troubleshooting[edit | edit source]
These are troubleshooting steps for basic operations. For complex issues, contact Latu Kolopeaua via email at lk88@humboldt.edu
| Problem | Suggestions |
|---|---|
| Boards give students splinters | Smooth out the board with sand paper |
| Bags get a tear | Just it closed or use tape |
| Board on the cart comes off | Zip tie the board back on |
Suggestions for future changes[edit | edit source]
These are suggestions that we believe will only improve the boards.
- Paint the boards with the school colors.
- Make other boards to match with the boards already made.
References[edit | edit source]
https://www.designingbuildings.co.uk/w/images/4/4c/Screws.jpg
https://images-na.ssl-images-amazon.com/images/I/81gIbPQAvpL._AC_SX522_.jpg