Introduction[edit | edit source]
Many third world countries suffer from illiteracy especially in rural areas that are not connected to electrical systems. Low family income, crowded schools, crowded home conditions, lack of transportation to schools, lack of governmental funding for schools, gender roles, and racial differences are all factors that contribute to a significant percentage of the population that cannot read and write (Oberai 135-141). The World Bank and other organizations have tried to implement programs for mass literacy to allow people to economically empower themselves but many of these programs discriminate against certain cultures or exclude people without access to community centers (Naz 49). Literacy is a social practice and is ideological in nature: it “is embedded in the identities […] of those involved with it.” (Satow, 36). Some communities have very limited resources, which makes it hard for children to have adequate educational opportunities. One obstacle of learning is a source of light to aid in studying after dark. Work and high daytime temperatures can make studying at night ideal. Resources are not always easily located or affordable. Though a portable lamp might seem like an adequate solution, they are in fact costly, attract insects, are bulky, and have breakable parts.
Our Project[edit | edit source]
There is a solution that corrects the problems of conventional lamps. The Night Reader allows for a low cost, portable, insect-free solution. These rural communities could make good use of locally available scrap materials to create personal portable reading lights for extra studying time during the night. Using all scraps and recycled materials, the Night Reader does not create additional waste and does not need to be manufactured commercially. The design is an inexpensive one: the only necessary monetary cost comes from two LED lights (about $.50 each).
Our Goals[edit | edit source]
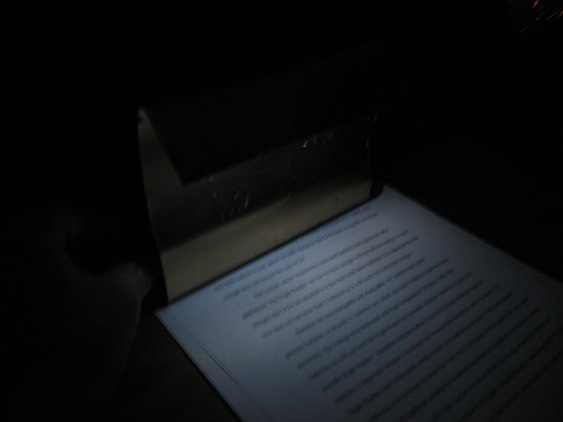
The solution needs to be an easy design that anyone could put together with the help of a manual. It must be made with inexpensive, simple parts that are easily located. Since children will use the Night Reader, it needs to be easy to maintain, portable and not heavy. There is a picture of our prototype in action at the top of this page.
Some Helpful Basics[edit | edit source]
Batteries[edit | edit source]
Batteries are chargeable and non-chargeable. Non-chargeable batteries are more appropriate for this project in a third world setting because they are free and recycled. Batteries store electricity so that a constant source of power is not needed.
How many batteries do I need? What's the maximum voltage?[edit | edit source]
For a white LED light you would need a maximum voltage of around 3.8 volts. We were able to get this much voltage from 3 used D sized batteries.
Why recycled batteries?[edit | edit source]
Batteries still have voltage in them after they have been used up by most modern appliances. These recycled batteries can be used to light up LED’s for a very long amount of time. These batteries have already been created and used, so there is no additional waste like there would be with new batteries. In our experience we found that D sized batteries work best because they retain their voltage even when most of the energy has been used up.
Current[edit | edit source]
Electricity is the movement of electrons. This movement of electrons is a current. The circuit needs to be closed for the lights to light up. A closed circuit is a completely undisturbed (circular) path of electrons through a wire that conducts electricity (a conductor). The energy to form the current comes from the batteries.
Series vs. Parallel Circuits[edit | edit source]
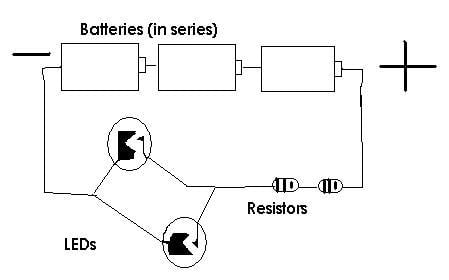
There are parallel and series circuits. In a series circuit (mini diagram: OOO----battery), the light sources are connected in one line of wire with the battery. In a parallel circuit (0=0=0==battery), the lights are all directly connected with the battery. In our project, the batteries are in series and the batteries are in parallel.
Design[edit | edit source]
Materials/Tools[edit | edit source]
- 1 Piece of tin, salvaged. Ideal piece of metal is 5-7 inches width and 8-10 inches in length
- Salvaged/recycled wire
- Salvaged resistors
- 2 LEDs
- Adhesive (tape or glue)
- Recycled batteries
- Soldering iron
- Tin snips (optional)
LEDs[edit | edit source]
Electricity only flow one direction in an LED. The positive side of the LED light is the tiny side We used two white 80-100 DG LEDs. You can purchase LEDs online, at Radioshack and some hardware stores. LEDs can also be salvaged as long as they have not been damaged. There are many different colors, angles, and brightnesses for LEDs and this determines the amount of voltage needed for them to turn on. For example yellow LEDs would need a lower voltage then a white LED but they probably would not be as bright.
Resistors[edit | edit source]
Resistors can be purchased or salvaged. When trying to salvage them, look on the circuit boards of electronic devices. We used two 300 ohm resistors ¼ watt.
Cost[edit | edit source]
- Two LEDs $1.00 (can be recycled LED’s)
- Resistors $1.00
- Recycled tin $0
- Soldering Iron $10-15
- Recycled wire $0
- Recycled switch $0
- Recycled batteries $0
Construction Process[edit | edit source]
Salvage Materials[edit | edit source]
The first step in the construction of this reading light is to search through your local scrapyard or recycling center to try to find the majority of the materials you will need. Batteries and wires are probably the easiest thing to find salvaged but by taking apart older electronics it is also possible to find resistors and LEDS. You should try to find a sheet of metal for the housing that can be bent or cut like tin or sheet metal.
How to cut tin[edit | edit source]
Sometimes you will need to cut the tin pieces you salvage because they are too long and bulky. Ideal width is 5-7 inches. This needs to be long enough to hold 3 batteries in series. Ideal length is 8-10 inches but a little smaller is fine you just need to adjust your proportions so that the night reader has an adequate base to sit on and a hood to reflect light downward. You need to have tin snips for this. Measure out the desired length and width make a cut on both ends of piece. Cut through to the opposite snip. To make the cutting go faster and easier, bend the metal away from the cut to allow snips to get in the cut.

How to fold Metal[edit | edit source]
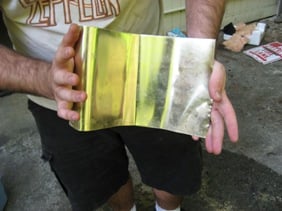
Tin is very pliable and easy to bend without the use of tools! Using a flat surface for support, bend the tin into a straight piece if it not already in that position. Use your body weight to flatten out the metal. Use natural angles in your environment to help to bend the metal.
How to fold the LED housing[edit | edit source]
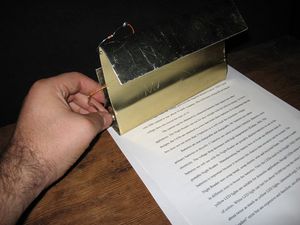
One end needs to house the LEDs. This will be upside-down and face the surface it sits on. Using a flat surface, bend one end to make a “U” or a “V”. There are no calculations, the housing just needs to be big enough to house the circuit, so the “U” should be at lease ½ inch in diameter. This hood reflects the light down on to the page to be read and it also minimizes the brightness that would normally attract insects and other pests.
How to fold the Body[edit | edit source]
Face the U so that it is upside down and faces the earth. The straight side should be at a 90-degree angle to the earth. Measuring 3 inches from the center of the “V” bend the metal away from the V at a 90-degree angle so that it now can stand upright on its own. The whole construction up to this point should look like an “S”.
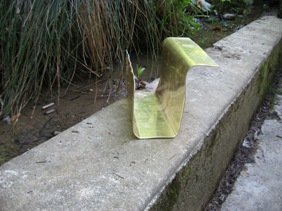
Battery housing[edit | edit source]
The other end needs to house the batteries. Leave a 1 ½ inch base and then fold up the remaining portion up towards the sky and press it into the other standing wall. This is where your batteries sit! It is best to fold one end very tightly so that the batteries can be held in place by the shape of the battery housing. When the batteries and LEDs are in place the wire can act as a switch for the circuit by bending it so that the wire tension holds it on to the end of the battery row.
How to wire the circuit[edit | edit source]

The batteries are in series and are laid from positive to negative. A wire connects the batteries with two resistors that are soldered onto the wire. From the final resistor, two wires are soldered together. These wires go to two LED lights. They are soldered onto the positive (tiny) side of the LEDs. The LEDs are then soldered onto one wire that goes to the negative end of the battery. A switch, which opens or closes the circuit (turning it off or on), can sit at either end of the battery. The circuit is held to the tin frame with some kind of adhesive such as tape or glue.
How to solder[edit | edit source]
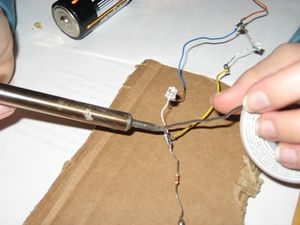
With a heated soldering iron, melt the solder onto the connection between two wires. This is best done on a flat metal surface. Hold the wires together until the solder cools, about two seconds. Keep trying until successful—it's kind of frustrating to accomplish! Be careful not to get hot solder on skin and do not breathe in fumes.
Testing[edit | edit source]
It works! It has been periodically turned on and off for three weeks now.
Discussion[edit | edit source]
Our version of the Night Reader can be made using a variety of materials. Another design we discovered made the case for the batteries out of two layers of cloth, that when sewn into rectangles could be made stiff with inserted cardboard. This design could be mailed. Another design features a single solar cell obtained from a recycled solar garden light. This light recharges itself but has more complicated, expensive parts such as a voltage regulator. The Night Reader’s adaptability is important since different communities have different materials available.
