
Hello! We are Creem Cheezy, the creators of the Oyster Filter. This filter was built to demonstrate water quality but in a more fun and innovative way. The Oyster filter is an educational filter, the audience is able to watch as the dirty water becomes cleaned.
Background[edit | edit source]
After a rigorous debate, we decided to work on Man-made Oyster filter as our designated project. Our teammate Fin Cantu came up with this genius idea, inspired by the methods oysters use to filter the sea. Oysters let water run through their gills, this action filters nitrogen from the ocean. We incorporated this method into a 3D printed Oyster. The substrate would be placed into PVC capsules, with a steel hose adapter on each end. A tube is connected to the ends of the adapter. This Oyster Filter is a fun and educational filter, not only does it explain how Oysters function, but it also explains how filters work.
Problem statement[edit | edit source]
The objective of this project is to provide the School of Engineering with a water quality demonstration. There was a lack of educational demonstrations for engineers and those who come for experiencing the Engineering of Cal Poly Humboldt.
Criteria[edit | edit source]
The following is a criterion we designed based off our clients agenda.
| Criteria | Description | Weight (1-10) |
|---|---|---|
| Cost & Sustainability | Cost influences accessibility. Sustainability is a CPH priority. | 5 |
| Ease of Setup & Breakdown | Easier to assemble more likely to be used | 7 |
| Durability | More durable is more sustainable,. | 8 |
| Size & Weight | More durable is easier to assemble,. | 6 |
| Educational Value | Promotes what CPH Teaches. | 9 |
| Engagement | More engagement means more outreach. | 10 |
| Aesthetics | Better aesthetics means more attention and engagement | 9 |
Prototyping[edit | edit source]
Through this prototyping process, we learned a filter can be greatly affected by the setup the substrate is in.
-

Project Sketch
-

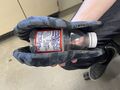
Quin holding Oyster connected through tubing.
-
First prototype of "PVC" capsules placed into oyster container.
-
Container used before the oyster was printed


Final product[edit | edit source]

Construction[edit | edit source]
Firstly, the shells where 3d printed with silky PLA, giving it a silky texture. The Shells are held to the board by two screws each, put through the foam board, and the shells are attached to one another by some springs melted into them, which act as a hinge. The PVC capsules were cut to length, and steel mesh screens were installed in the caps with hot glue after installing the metal ports/adapters. Later, in the rock and activated charcoal capsules, cheesecloth was also installed on both the input and output. The capsules were then filled with substrate (Activated charcoal, sand, or rocks), and then glued shut. They were chained together with 1/2" vinyl tubing. The 3D printed shells had holes melted into them by using one of the steel adapters, heated up with a blowtorch.
- Construction Gallery
-

Filtration system being tested and constructed
-

Finished Oyster Filtration System Setup
-

Quin holding Oyster connected through tubing.


Video instructions[edit | edit source]
A good way to display a process is by making a video explaining your process. See Template:Video for information on how to add and annotate videos.
Bill of materials[edit | edit source]
In the table below the itemized billing is listed. These items are found in your local hardware store online on Amazon.
| Item | Amount | Cost per unit | Total |
|---|---|---|---|
| Steel Adapters | 1 | USD 14.99 | USD 14.99 |
| PVC caps | 1 | USD 10.74 | USD 10.74 |
| Cheese Cloth | 1 | USD 4.86 | USD 4.86 |
| PVC | 1 | USD 23.92 | USD 23.92 |
| Glue and Caps | 1 | USD 21.46 | USD 21.46 |
| Barb Hose Adapter | 1 | USD 21.57 | USD 21.57 |
| Hose Clamps | 1 | USD 8.07 | USD 8.07 |
| Filament | 1 | USD 39.99 | USD 39.99 |
| Tank | 1 | USD 42.99 | USD 42.99 |
| Water Pump | 1 | USD 19.99 | USD 19.99 |
| Bucket | 1 | USD 7.99 | USD 7.99 |
| Grand total | USD 216.57EUR 186.25 <br />GBP 158.10 <br />CAD 268.55 <br />MXN 4,515.48 <br />INR 16,210.26 <br /> | ||
Operation[edit | edit source]
See Video Instructions above
Maintenance[edit | edit source]
Maintenance can be done by anyone who can lift 10 Ibs above their shoulders. Maintenance should be done after every use to prevent clogging and improper filtration. Items necessary for maintenance are listed in the table below along with the cost per unit.
| Item | Amount | Cost per unit | Total |
|---|---|---|---|
| Hot Glue | 1 | USD 1.00 | USD 1.00 |
| Cheese Cloth | 1 | USD 4.86 | USD 4.86 |
| 1" diameter 3.5" length PVC pipe — (per filter unit in need of replacement) | 1 | USD 0.50 | USD 0.50 |
| 1" PVC Cap — (per filter unit in need of replacement) | 2 | USD 2.78 | USD 5.56 |
| 1/2 in. Barb X 1/2 in. D MPT Galvanized Steel Adapter — (per filter unit in need of replacement) | 1 | USD 5.00 | USD 5.00 |
| 1/2 in. Barb X 1/2 in. D MPT Brass Pex Adapter — (per filter unit in need of replacement) | 1 | USD 4.00 | USD 4.00 |
| Stainless Steel Mesh Screen (120x40cm) | 1 | USD 15.00 | USD 15.00 |
| Christy's Red Hot Blue Glue Blue Cement For PVC 4 oz | 1 | USD 8.59 | USD 8.59 |
| Grand total | USD 44.51EUR 38.28 <br />GBP 32.49 <br />CAD 55.19 <br />MXN 928.03 <br />INR 3,331.57 <br /> | ||
Maintenance schedule[edit | edit source]
Below is the maintenance schedule per use as well as annually.
- Per Use
- Run clean water through a filtration device until runs clear
- Backflow the filtration device to remove excess particulate (run clean water through the output end for 5 minutes)
- Yearly
- Construct 3 new filter pods.
- Cut a 3.5" length of 1" PVC
- With one of the adapters (input, steel), heat and twist into one of the PVC caps ~0.5-1cm. Cool directly after with water.
- Repeat with other adapter and cap
- Cut Steel Mesh into a circle fitting into the PVC cap. Hot glue around the adapter, and raised enough to glue the screen in place, directly on top of the adapter output.
- Repeat with other adapter and cap
- If it is the sand or activated charcoal, add a 4-layer stack of cheese cloth on top of the steel mesh, to hold in the substrate(s).
- Glue the outflow PVC cap to the PVC pipe with PVC cement, fill with substrate, then glue the inflow cap on.
- Re-Attach to system, and you're all good to go!
Conclusion[edit | edit source]
Testing results & Discussion[edit | edit source]
The methods we used for testing was trying our different ways to layer our substrate. We went through different trial and error. Mainly our biggest issue being the sand washing out as the water filtered out. Luckily we were able to figure out what the best option was which was separating the substrate into different capsules.
We also tested out how we were going to place the substrate. At first our team was going to use only one PVC capsule and layer all the materials in the correct order. But this plan did not work as the sand would wash out. Then our team tried using a cheesecloth to hold the sand up from washing out. This caused the water to struggle to pass through. It was also difficult to compact the materials causing the water to not pass through the center and to pass through the outer side of the materials. We decided to separate each of the materials by placing each into its own capsule. To fix our sand issue we purchased coarser sand and this helped the washing out problem. Each capsule had it's own material, sand, activated charcoal, and rocks. Connected through vinyl tubing, which are attached through hose clamps. The water would be pushed by a pump. This would help push water through quicker and be able to back wash to clean the tubing.
Lessons learned[edit | edit source]
During the process of building, we went through the trouble of trying to keep the sand from washing out. We used different methods. Trying to change where the sand is to adding a cheese cloth to keep it from washing out. Until we decided having different PVC capsules for each substrate type. We learned that having such fine sand also affects how easily it can wash out. So we decided getting coarser sand would fit better.
Next steps[edit | edit source]
Further into the future, man-made oyster filter would become a great way for people to enjoy filtering their water. It would be a nicer experience, unlike when you fill your Brita and have to wait for the water to filter out before refilling it. Man-made oyster is fun, interactive, and entertaining.
Troubleshooting[edit | edit source]
| Problem | Suggestion |
|---|---|
| Tubing Clogging | Backwashing the system would help to unclog the tubing. |
| Leaking from Tubing | First check for any tears on the tubing. If none, push the tubing onto the hose clamp tighter, for a possible looseness. If this does not work, using plumbers tape can be another option. |
Team[edit | edit source]
Spring 2024
References[edit | edit source]