3-D printer tent

This page describes the open source design of an enclosure for open source RepRap-class 3-D printers.
Designed to minimize warping and cracking of 3DP parts as well as contain gaseous volatiles released during the 3DP process. A carbon filter fan was added to the design to further prevent the release of volatiles.
Methods[edit | edit source]
The 3d printing tent method detailed below is for Lulzbot Taz printers. It can be adapted to other 3d printers but dimensions will need to be changed.
The tent is made out of two parts a PVC tubing frame and a Mylar shell. Each part's method section begins with a bulleted list of components and tools. This is followed by a number list that are the steps to create each part
Frame
- 1/2" PVC tubing
- 4 3d printed 1/2" PVC corner connectors https://www.thingiverse.com/thing:4732386
- Hand saw or other implement to cut PVC tubing

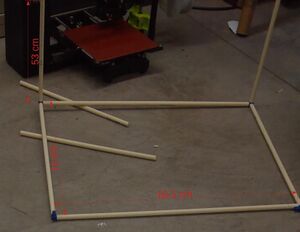
- Cut PVC - 6 sections in total
- 4 lengths of 53 cm
- 2 lengths of 70 cm
- 2 lengths of 83.5 cm
- Assemble the frame by connecting the PVC sections as shown
- This may require sanding to clean up the sawed ends of the PVC
Shell
- 6 mil thickness Mylar material https://www.amazon.com/dp/B01N5MHXQD/
- Strong long lasting tape - Gaff tape was used but Duct tape will also work
- Scissors
- Optional:
- Clear vinyl - used to make viewing window https://www.amazon.com/Plastex-Alpine-Guage-Vinyl-Fabric/dp/B01B50HIB2/ref=sr_1_6?s=arts-crafts&ie=UTF8&qid=1538000203&sr=1-6&keywords=10+Gauge+Clear+Vinyl
- Sewing machine - was attempted to connect pieces of Mylar but material was too thick for the sewing machine
- Cut Mylar - 3 pieces in total
- 2 top/bottom pieces 87 cm x 74 cm
- Make sure to leave 10-25 cm of excess on all sides that will be used to connect pieces
- Make a slit only in excess parallel to 74 cm direction up to correct dimension to allow excess to be folded up
- 1 side piece 55.5 cm x 350 cm (87*2(front/back)+74*2(sides)+5(front magnet flap)+28(excess))
- Optional: Cut flap for vinyl window in front side 23 x 28 cm
- 2 top/bottom pieces 87 cm x 74 cm
- Fold Mylar to prepare for taping

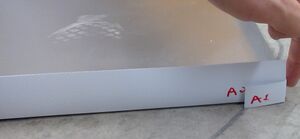
Shows how to do folding to create top/bottom trays - Fold excess of top/bottoms to form shallow tray
- Fold side piece perpendicular to wrapping direction at numbered widths to form wall sections
- 5 cm- front magnet flap
- 74 cm- left side
- 87 cm- back
- 74 cm- right side
- Tape Mylar to finish 3d printing shell
- Tape excess fold on top/bottom tray
- Tape side piece to bottom tray while lining up the first fold in the side piece with corner of the tray
- Continue wrapping side piece and taping
- Make sure folds line up with each corner
- Do not tape front or area where electrical cord will be passed through
- Tape top tray on to finish shell
- Optional: Tape vinyl window onto door
Finish Touches
These steps should be completed after putting the frame and shell together to form the tent
Magnetic Door[edit | edit source]
- 1/2" Magnetic tape https://www.amazon.com/Magnet-Adhesive-Backed-Flexible-Magnetic/dp/B00HPAMRI6/ref=sr_1_33?ie=UTF8&qid=1545168464&sr=8-33&keywords=1%2F2%22+magnet+tape
- Cut 6 pieces of magnet tape to frame the door and front magnet flaps
- Peel and stick 3 of these strips and adhere them to the magnet flaps
- Peel the remaining magnet strips and magnetize them to the ones you just applied
- Align the door and adhere it to the peeled magnet strips
- Additional tape may be required to secure the strips
- Try opening and closing the door to see if this is necessary
- Addition magnets can also be used to conjunction to provide a better seal in some areas
Wire Hole
- Decide where you want the power cord to come out of
- This will depend on the location of your power outlet but the lower left hand side of the tent works well
- Make a two cuts in both the side and bottom material to make a hole to insert the power cord
Carbon Filter
- 12V computer fan
- Carbon filter material
- 3d printed carbon filter holder

