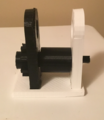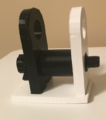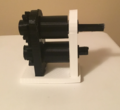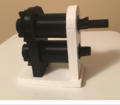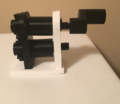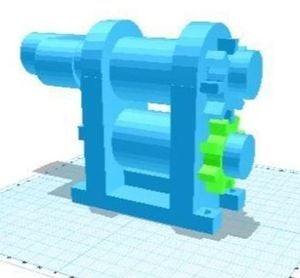
Pea picking is a common practice across the United States and around the world. People grab their family's and head out to the field to collect this delicious treat. Post pea picking families are challenged with hours and hours of work of shelling the peas by hand. This manual rotating pea sheller enables families to decrease their time processing their peas and more time cooking them. The pea is inserted in one end and rotated. The pea is forced out of the shell and the shel exits out the other end. All by rotating the handle on the side of the pea sheller.
Bill of Materials[edit | edit source]
- BOM
- PLA Filament ($20 per 1 kg)
- Duct Tape
- Epoxy (to ensure good function)
- Clamp to brace against table
Check all the OpenSource Code and STL files on YouImagine
Tools needed[edit | edit source]
- MOST Delta RepRap or similar RepRap 3-D printer
- 1.75mm PLA Filament
Skills and knowledge needed[edit | edit source]
- 3D Printing Capability
- Obtaining Peas to Shell
Technical Specifications and Assembly Instructions[edit | edit source]
Print Estimates (All components 20% infill unless noted)
- Base Model: 80 grams of PLA, 5 hour print (Note: Base was printed in 3 pieces because of personal 3D printer issues, please print base as one piece)
- Gears x2: (Total) 12 grams, 46 minutes print
- Handle: 27 grams, 1.5 hour print
- Roller x2: (Total) 38 grams, 2.25 hour print
- Rotational Inserts: 16 grams, 1 hour
- Top Rod: 9 grams, 54 minutes (100% infill)
- Bottom Rod: 8 grams, 47 minutes (100% infill)
- Total PLA: 200 grams Total Printing Time: 12.2 hours **All estimates using Cura
- Manual Pea Sheller Components
-
Image of manual pea sheller components
Estimated Assembly Time: 1 Minute
Assembly Instructions
- Place Gear, Concave down, (1 of 2) and Small Rotation Piece (1 of 4) onto the Bottom Rotational Rod (Smaller)
- Insert Bottom Rotational Rod Assembly (Step 1) and insert into lower holes of Base component. While inserting through the hole line up and insert the rod through the Roller (1 of 2) as well.
- Place a Small Rotational Piece (2 of 4) onto the end of the Bottom Rotational Rod.
- Tape the end of the Rod with Duct Tape, not allowing it to fall through the assembly.
- Place Gear, Concave Down (2 of 2) and Small Rotational Piece (3 of 4) onto the Top Rotational Rod (Larger Rod)
- Insert Top Rotational Rod Assembly (Step 5) and insert into Upper holes of Base component. While inserting through the hole line up and insert the rod through the Roller (2 of 2) as well.
- Place a Small Rotational Piece (4 of 4) onto the end of the Top Rotational Rod.
- Tape the end of the Rod with Duct Tape, not allowing it to fall through the assembly.
- Place Handle onto the end of the Rod and Rotate for use.
- Manual Pea Sheller
-
Bottom Rotational Rod Assembly
-
Inserted Bottom Rod Assembly with Roller and Rotational Piece
-
Taped Region of Bottom Rod Assembly
-
Top Rotational Rod Assembly
-
Inserted Top Rod Assembly with Roller and Rotational Piece
-
Taped Region of Top Rod Assembly
-
Assembly with Handle Attached
Common Problems and Solutions[edit | edit source]
- Printing - Ensure your printer is operating optimally, over extrusion while printing large assembly causes printer to fail.
- Location of tape to ensure that the components do not fall apart is essentially for assembly to work properly
Cost savings[edit | edit source]
- Total Cost Estimation : $4 for filament, $2 Duct Tape, Clamp for bracing against table $5 -- $11 Total
- Pea Sheller -- $42.99 [1]
- Total Savings -- $37 (Approximately 74% Cost Savings)
Benefited Internet Communities[edit | edit source]
- Homesteading Community [2]
- Agriculture [3]
- Nutrition [4]
- Health and Wellness [5]
- Saving the Planet [6]
Improvements[edit | edit source]
- Instead of attaching directly to the table, Add a rectangular piece that can attach to a table with a bolt
- Add a plate that makes peas enter the rollers
- Bins on each side to catch the peas and shells


