
This page describes the updates that team ESAT, Engineers for Sustainable Appropriate Technology did to fix the CCAT Earthen Terrace project. The Campus Center of Appropriate Technology also known as CCAT, had the right side of the Earthen terrace in disarray with cracks appearing on the wall and large holes on the top surface of the wall.
Background[edit | edit source]
This project started back in the spring semester 2012, when a couple of Engineering 305 students constructed a Terrace Garden for CCAT. The original intent was to provide a sturdy natural plaster covering the Earthbag garden terrace. As of 2024 the terrace holds multiple fruits and vegetables. However, it also showed signs of damage including cracks and large holes on the top face of the wall.
Problem statement[edit | edit source]
The objective of this project is to design and implement a sustainable long term solution to improve the functionality of the terrace structures and prevent further damage due to erosion for CCAT.
Criteria[edit | edit source]
| Criteria | Description | Weight (1-10) |
|---|---|---|
| Cost | Must remain within the allotted budget. | 10 |
| Environmental Justice | Low environmental impact. | 10 |
| Walkability | Must be strong enough for an average person to walk on. | 9 |
| Longevity | Must last longer than previous efforts. | 7 |
| Aesthetics | Must match or exceed the aesthetic standard of the other wall. | 6 |
Prototyping[edit | edit source]
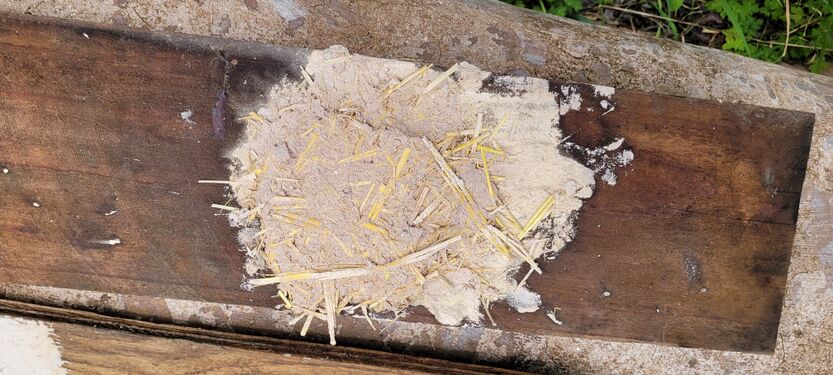
Before reaching the final product a couple of prototypes and tests were made to see which plaster and paint recipe's would work. The first prototype (labeled as First Ever Prototype) shows how team ESAT didn't have a specific recipe given so they had to eyeball. From this they learned that if the amount of each material wasn't calculated properly then the weather conditions could cause the materials, in this case the clay, to be swept away by rain leaving straw sitting in chunks of mud. The second prototype (also known as Test 1) was conducted with a specific balanced recipe in mind as there was more of a focus on proper amount and less eyeballing and guessing. This time they learned that there would have to be more water, less straw, and more clay as the result showed cracks in the plaster and the hay was exposed leading to the realization that it would at some point rot. The third prototype (also called Test 3) was far better with the results at it actually looked like plaster this time. However, it soon showed cracks leading team ESAT to note down that they needed way more clay than sand to keep the plaster from cracking too quickly.
- Sample gallery
-
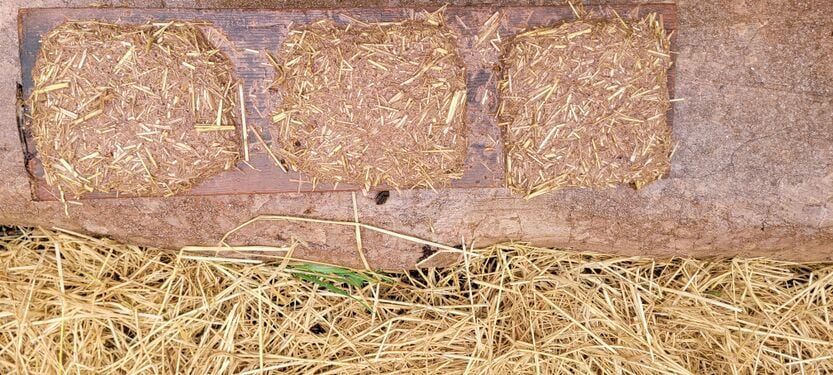
First Ever Prototype
-
Second Prototype (Test 1)
-
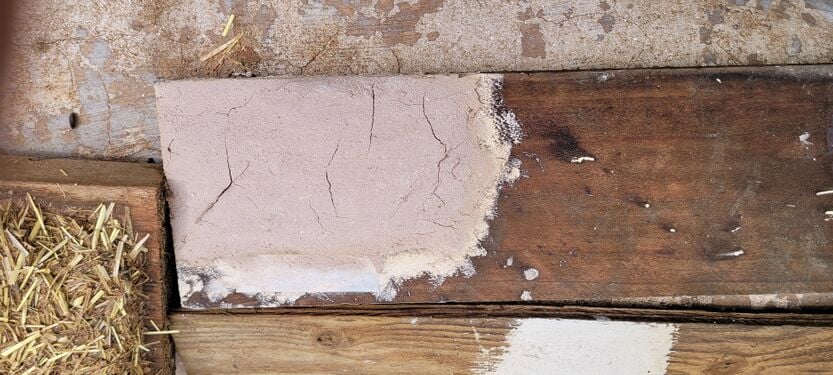
Third prototype (test 3)


Final product[edit | edit source]
After finishing the task at hand, the final product is shown below as a colorful wall with zero signs of cracks or holes present on the wall.
Construction[edit | edit source]
A very complete description of how the final project is built. This large section should have lots of pictures. Use the Help:Images#Galleries and probably Template:Steps (e.g. Barrel O' Fun Worm Bin Instructions).
- Sample gallery
-
Sample caption text.
-
More sample caption text. This would look better with different images.:)
-
Even more sample caption text.


Video instructions[edit | edit source]
A good way to display a process is by making a video explaining your process. See Template:Video for information on how to add and annotate videos.
Bill of materials[edit | edit source]
The primary costs associated with project are hydrated lime and wool. Since the majority of the materials for this project were donated, the bill of materials table below is not representative of the cost to reproduce this effort elsewhere.
| Item | Amount | Cost per unit | Total |
|---|---|---|---|
| Lime 50 lb bag | 1 | USD 35.00 | USD 35.00 |
| Sand 0.5 cubic foot bag | 1 | USD 5.00 | USD 5.00 |
| Clay 240 lbs — Donated | 1 | USD 0.00 | USD 0.00 |
| Quark (expired milk) 2 gallons — Donated | 2 | USD 0.00 | USD 0.00 |
| Natural Pigment — Donated | 1 | USD 0.00 | USD 0.00 |
| Vinegar 1 quart | 1 | USD 2.20 | USD 2.20 |
| Wool 20 lbs | 1 | USD 80.00 | USD 80.00 |
| Grand total | USD 122.2EUR 105.09 <br />GBP 89.21 <br />CAD 151.53 <br />MXN 2,547.87 <br />INR 9,146.67 <br /> | ||
Operation[edit | edit source]
This is how to operate. It should have a brief introduction. You might want to show images or videos with step-by-step instructions when needed.
Considering how this is a wall, the only real operation is with mixing the materials including the plaster and the paint.
Add one part for each (equal to 1,000 grams) of both sand and lime into a container for mixing plaster. Next add five to six parts (or 5,000 to 6,000 grams) of dry garden clay to the container.
To start mixing add water to the container to let the mixture be wet and allow the materials to combine.
Maintenance[edit | edit source]
Introduce this maintenance section. Help ask the questions:
- There are some needed actions for maintaining this wall including the fact that when the wall beings to get damaged they will need to be repatched with plaster.
- This will often be done at the very least every 2 to 4 years given the weather conditions of Humboldt county and from the amount of people who may or may not cause damage to the wall.
- Anyone can perform this kind of maintenance but if there would be a specific group of people it would be Engineering college students or adults who specialize in engineering.
Maintenance schedule[edit | edit source]
- Daily
- Plastering the right wall can take about eight to nine hours to complete, its better off to do during daylight while the sun is still high in the sky as it will allow the plaster to dry properly on the wall.
- If time is limited work 2 to 3 hours a day to do as much as possible.
- Painting the right wall can take about 2-3 hours a day with mixing the paint and letting it dry.
- Weekly
- Work on the wall at least 3 or 4 days of the week.
- Monthly
- Doesn't require monthly maintenance.
- a monthly task
- Yearly
- Doesn't require yearly maintenance.
- a yearly task
- Every __ years
- As mentioned earlier every four years or so, the wall should be inspected incase it may require maintenance.
Conclusion[edit | edit source]
Testing results[edit | edit source]
Describe the testing results.
The testing results were hard but helpful in showing how to improve the recipe of the plaster. For example, after the first result, it was necessary to add more clay and less sand. We also found that certain paint plasters would not work for our design due to the textures they had.
Discussion[edit | edit source]
The testing results concluded with the discovery of what a proper plaster recipe should be. Which mean that we had to go with a wool-crete plaster and for the design we used milk paint to achieve a sealing coat and to add color to the walls. Throughout test we had to over come many obstacles that involved the weather in Humboldt. Many of our beginning test were unable to dry or absorbed too much moisture which wouldn't work for our projects needs.
Lessons learned[edit | edit source]
From this project, we learned how important knowing the clients wants are and how to openly communicate with our client to achieve the best desired results. While testing a big lesson we had to learn was proper time scheduling and how to work around difficult weather to stay our track with our time table.
Next steps[edit | edit source]
To be updated in 2028.
Troubleshooting[edit | edit source]
| Problem | Suggestion |
|---|---|
| Paint chips | Mix some paint and repaint the wall |
| Wall Cracks | Mix some plaster to patch up the cracks. |
| Another issue | Etc. |
Team[edit | edit source]
Introduce team and semester in the following format:
- Lonny Grafman
- Ahtalya Ramirez
- Xavier Lopez
- Sierra Erlandson
- Robertson Harris
- Emilio Velis
References[edit | edit source]